
Securing Leather Stitches

How to Secure Leather Stitches for Lasting Strength and a Professional Finish
Secure leather stitches come from choosing the right stitch, handling thread with care, and finishing edges precisely so seams don’t fail and items keep both their function and appearance. This guide breaks down what makes a stitch secure—locking geometries, thread strength, and edge preparation—and shows how those choices extend product life and elevate the finish. You’ll find which hand-sewing methods give the best tensile strength, step‑by‑step ways to lock and trim thread ends, the tools professionals rely on, and how manufacturers check stitch integrity at scale. Sections are laid out for quick reference: why durability matters, strongest hand techniques, locking and finishing steps, tool specs, and production quality standards. We use common leathercraft terms—saddle stitch, waxed polyester thread, stitch tension control, edge sealing—so makers, buyers, and wholesale clients can act on the advice and specify goods that last everyday use.
Why Stitch Durability Matters for Premium Leather Goods
Stitch durability decides whether seams carry load over time or become the weak point that ruins function and looks. Durable stitching spreads stress along the seam, stands up to abrasion from regular use, and keeps edges aligned under load—together these factors lengthen useful life and keep a product looking premium. Buyers of jackets, bags, and wallets expect seams that hold up to flexing and weight, so stitch integrity affects perceived value and return rates. Below we cover the mechanical causes of stitch failure and how correct technique prevents them.
In practice, stitch durability delivers a few clear benefits:
- Load distribution: Proper stitching spreads force across multiple points to avoid concentrated tearing.
- Abrasion resistance: Secure thread paths and controlled tension reduce wear where seams rub hardware or clothing.
- Aesthetic longevity: Locked stitches keep even spacing and prevent puckering that damages perceived quality.
Those outcomes show why choosing the right stitch and materials is part of design, not just production. The next section explains common seam failure modes and how locking stitches change the mechanics.
How Secure Stitching Extends Product Life
Seam failure usually starts where repeated bending, tension, or edge fatigue concentrates stress, causing thread abrasion or leather tearing around holes. Secure stitching counters that by creating locked stitch geometries that resist slippage and spread tensile forces over more material, slowing failure initiation. For example, a wallet corner sees repeated bending and abrasion; a locking hand stitch with waxed thread limits thread movement and reduces the chance of unraveling. Understanding these mechanics helps makers choose stitch patterns and thread types targeted at high‑stress points. The following section describes how manufacturers apply these principles at scale.
How Does Pakistan Leather Ensure Superior Stitch Strength?
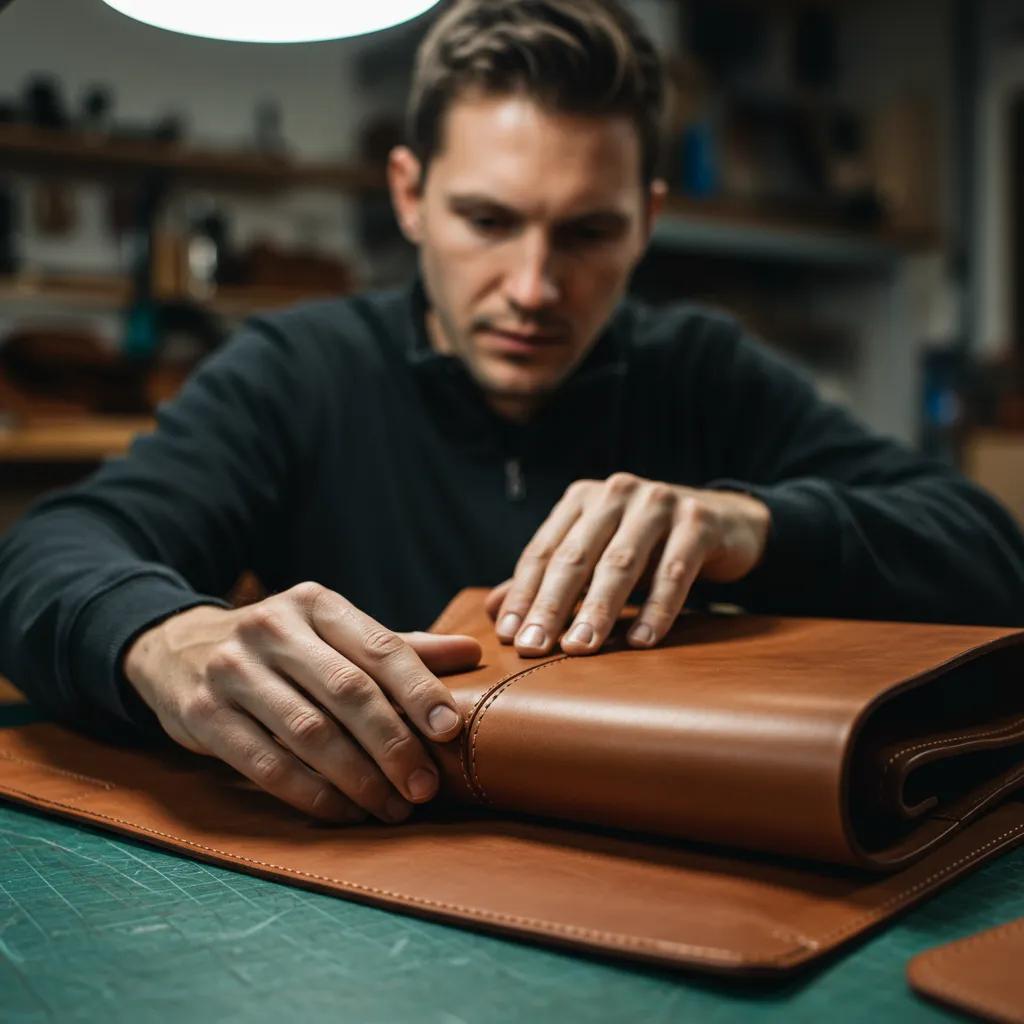
Pakistan Leather takes a production‑focused approach: careful material selection, experienced hand‑stitching, and in‑process inspections to deliver strong seams. Craftspeople pair high‑tenacity waxed polyester threads with stitch types matched to leather thickness and function—heavy saddle stitching for straps, finer lockstitches for garments—so each seam is engineered for its load profile. Inspectors check stitch tension, spacing, and edge finish during assembly to catch issues early, and product categories like jackets, bags, and wallets serve as proof points of those techniques. These practices turn technical stitch choices into real durability buyers and wholesale clients can specify with confidence.
Hand‑Sewing Techniques that Create the Strongest Seams
Different hand‑sewing methods lock thread, resist pull‑through, and respond to abrasion in distinct ways. The saddle stitch is widely accepted as the most durable for leather because each stitch is locked and the seam won’t unwind if a thread breaks. Knowing the pros and cons of saddle stitch, backstitch, and machine lockstitch helps you match technique to expected wear and product function. Below is a quick comparison and where each method performs best.
Top hand and machine techniques with their primary advantages:
- Saddle stitch: Locks every stitch and delivers superior tensile strength for load‑bearing seams.
- Backstitch (hand): Produces a continuous locked row that’s strong and handy for repairs or variable spacing.
- Machine lockstitch: Fast and consistent but less redundant than saddle stitch—one thread path can unravel if it breaks.
These comparisons guide makers toward saddle stitching for high‑stress joins and machine methods for linings or low‑load areas. Next we explain saddle stitch mechanics and why it performs so well on leather.
Why the Saddle Stitch Works Best for Leather
The saddle stitch uses two needles on one thread, passing from opposite sides of each hole to form mirrored locks that prevent a single break from undoing the seam. That redundancy gives the saddle stitch high tensile strength and abrasion resistance because the thread carries load evenly and sits snugly in punched holes, reducing chafing at hole edges. Because saddle stitching is slower and more labor‑intensive, craftsmen reserve it for places where longevity justifies the extra time. The next section covers knot termination and hiding techniques that protect that strength at thread ends.
| Technique | Locking Mechanism | Ideal Use-Case |
|---|---|---|
| Saddle stitch | Mirror locking with two needles | High‑stress seams: straps, handles, bag openings |
| Backstitch (hand) | Overlapping stitches that recreate a locked row | Repairs, uneven seams, visible decorative seams |
| Machine lockstitch | Interlocked top and bottom threads on a single path | Linings, light‑load seams, high‑volume stitching |
How Knot Methods Stop Unraveling
Termination methods—hidden knots, backstitch locks, and selective surgeon‑style knots—create internal anchors or layered thread paths that resist pull and abrasion. A hidden knot is tucked into the final stitches so the visible surface stays clean while the knot is shielded from wear. Backstitch locking overlaps the last stitches to form a chain that won’t pull back through holes, and for some synthetics a controlled melt or set adds secondary security. The right termination depends on visibility, thread material, and whether the seam will face concentrated pulling; the next section outlines stepwise finishing methods to lock and trim threads correctly.
How to Lock Leather Thread for Secure, Long‑Lasting Stitches
Locking leather thread relies on a few repeatable finishing techniques—backstitching, hidden knots, and material‑appropriate seals—that prevent unraveling while keeping edges neat. The principle is simple: create redundant thread paths or physically fix the endpoint so the stitch chain can’t reverse under load, and choose a finish that suits the thread fiber and seam visibility. Below are practical, step‑by‑step ways to terminate thread ends and trim for longevity.
Follow these dependable steps to lock thread ends:
- Backstitch lock: Reverse several stitches to overlap threads and anchor the seam.
- Hidden knot: Tie a small knot and pull it into the seam interior so it stays protected from abrasion.
- Material finish: For synthetic threads use controlled heat to set the end; for natural fibers seal with edge paint or adhesive.
These techniques cover most leathercraft situations. The table below compares finishing methods and recommended materials.
| Finishing Method | Security Level | Recommended Materials |
|---|---|---|
| Hidden knot | High | Natural or waxed polyester thread; fine hides |
| Backstitch lock | Very high | All thread types; best for visible, load‑bearing seams |
| Melt/burn finish | Medium‑High (synthetics only) | Polyester/nylon threads; use careful, controlled heat |
This chart shows which termination suits each thread and seam function. Next we cover trimming and burnishing practices that protect thread ends and leather edges.
Best Practices for Thread Trimming and Finishing
Neat trimming and careful finishing reduce snagging and exposure that can lead to early stitch failure. Trim thread tails to a short, consistent length and angle the cut to lower bulk; protect the cut end with a sealant or edge paint. Use sharp micro‑scissors or flush cutters for clean cuts and a thread burner only on synthetics with controlled heat to avoid damaging the leather. After trimming, burnish the edge and apply a small amount of sealant where thread ends meet leather to guard against moisture and abrasion. These steps preserve appearance and add practical protection that improves long‑term durability.
How Waxed Thread Improves Stitch Security
Waxed thread gains grip from its coating: increased friction in the hole reduces slippage and helps knots hold under repeated loads. The wax also gives slight abrasion resistance and smooths thread feeding during stitching. Waxed polyester is the common choice because it balances tensile strength, UV resistance, and handling; compared with unwaxed thread it resists loosening during use and transport. Handling differences include a slightly stiffer feel when passing through holes but improved tension control—features many craftsmen prefer for consistent results. Choosing the right wax level and thread diameter for the leather thickness and seam purpose maximizes these advantages and sets the seam up for finishing.
Essential Tools for Professional, Secure Leather Stitching
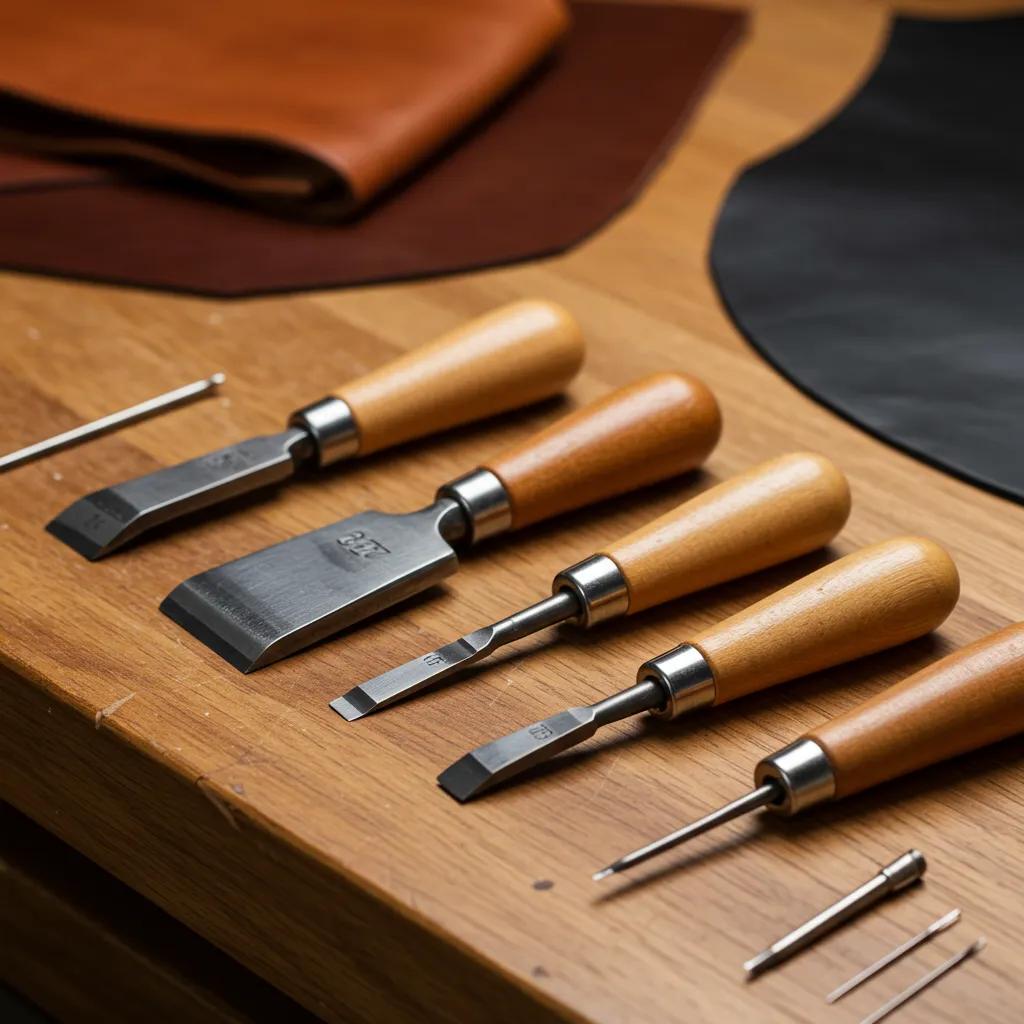
Secure, professional stitching depends on a compact set of tools that prepare, align, and support consistent work: awls and chisels for uniform holes, a stitching pony to hold parts steady, proper needles and thread burners for clean passes and finishes, and clamps and edge tools to keep lines true. Each tool has a mechanical role in the stitching workflow; choosing the right specs reduces hole fraying, uneven spacing, and inconsistent tension that weaken seams. The table below maps essential tools to their purpose and recommended specs.
Picking correct specs—such as prong count for chisels and needle gauge for thread—directly affects stitch integrity and wear performance. See the tool table.
| Tool | Purpose | Recommended Specs |
|---|---|---|
| Stitching chisel | Punches uniform holes | 3–6 prongs depending on seam length; spacing matched to thread size |
| Stitching awl | Opens and adjusts holes, helps control tension | Sharp, slightly tapered blade for clean entry without tearing |
| Stitching pony | Holds work for two‑handed saddle stitching | Sturdy clamp with adjustable angle for repeatable tension |
| Needles | Carry thread through holes | Blunt leather needles sized to thread diameter (e.g., #2–#6) |
| Thread burner / cutters | Trim and finish synthetic thread ends | Controlled flame or electric burner; sharp flush cutters |
Tools That Deliver Precise, Secure Stitches
Precision tools produce consistent hole spacing, clean edges, and repeatable tension. Using a chisel matched to thread size prevents oversized holes that weaken leather; blunt‑tipped needles avoid cutting fibers when pulling waxed polyester; and a stitching pony frees both hands for accurate saddle stitching and steady tension. Well‑maintained awls preserve hole geometry and clamps keep pieces aligned while edges are burnished. With the right specs and routine care, tools become enablers of durable leather joinery, not sources of variability.
How Craftsmen Use Tools to Maintain Stitch Integrity
Craftsmen follow a consistent workflow—prepare, punch holes, stitch with even tension, then finish—that lets each tool protect thread and leather. Preparation includes marking stitch lines and skiving edges to reduce bulk; punching uses chisels or awls sized to the thread; stitching uses a pony and steady hand tension to keep spacing uniform; finishing trims and seals thread ends and burnishes edges. This disciplined sequence prevents common mistakes—oversized holes, uneven tension, exposed knots—that cause early failure. Following the workflow turns good tools into repeatable quality across production runs.
How Secure Stitching Reflects Pakistan Leather’s Craftsmanship
Secure stitching reflects a maker’s material choices, workforce skill, and quality control. When those elements align, products meet retail expectations and wholesale/export standards. Pakistan Leather highlights artisan hand‑stitching, a curated selection of leathers and threads, and production practices that showcase its manufacturing capabilities. The section below outlines quality control steps and the customization workflow that support those craftsmanship standards, and explains how buyers and wholesale clients can specify stitch requirements.
Pakistan Leather’s craft practices that reinforce stitch integrity include:
- Skilled hand‑stitching: Trained craftsmen apply saddle stitching and secure knotting on stress‑prone seams.
- Material selection: High‑quality leathers and waxed polyester threads are matched to product use.
- Inspection protocols: In‑process and final checks focus on tension, spacing, and edge finish to ensure consistency.
These practices embed secure stitching into product development and production. Next we detail quality controls that make durable hand‑stitched items verifiable for wholesale and export clients.
Quality Controls That Ensure Durable Hand‑Stitched Goods
Quality control for hand‑stitched goods includes in‑process tension checks, sample destructive or load testing for critical seams, visual inspections for stitch spacing and knot security, and final audits that confirm edge sealing and finish integrity. Acceptance criteria often specify maximum stitch spacing variance, required thread diameters for load classes, and supporting evidence such as test reports or sample photos for wholesale orders. Documenting these checkpoints creates traceability for export clients and reduces return rates by catching issues early. These QC steps make stitch security a verified outcome, not an accident.
How Custom Hand‑Stitching Meets Customer Expectations
Custom workflows start with design approval, thread and stitch selection, and prototype sampling to confirm look and performance. Customers pick stitch styles, thread colors, and termination preferences that match aesthetic and functional needs. Pakistan Leather maps stitch types to product use—saddle stitch for load‑bearing bag components, finer hand locks for visible garment seams—while communicating lead times and sample approval steps. This structured approach aligns expectations with technical choices so final goods meet design and durability standards for retail or wholesale distribution.
Common Questions About Securing Leather Stitches
Short, practical answers help makers and buyers resolve common concerns about stitch strength, finishing, and preventing unraveling. Below are concise solutions to the most frequent questions, followed by a compact checklist you can use immediately when assessing or producing leather goods.
Quick answers for common concerns:
- How do you make leather stitches strong? Use saddle stitch or backstitch, pick a waxed polyester thread sized to the leather, and keep tension consistent.
- How do you prevent unraveling? Finish with a hidden knot or backstitch lock and seal synthetic thread ends when appropriate.
- What finishing protects thread ends? Trim close, burnish edges, and apply edge paint or sealant where thread ends meet leather.
These short answers give direct guidance for decisions and inspections and lead into a quick checklist for quality‑first assessment.
How to Make Leather Stitches Strong and Prevent Unraveling
A five‑point checklist captures essentials for strong, non‑unraveling stitches: choose saddle or backstitch for load‑bearing seams; use waxed polyester matched to leather thickness; pre‑punch uniform holes with a chisel; maintain even hand tension while stitching; and finish thread ends with a hidden knot or backstitch lock. Each step targets a common failure mode—misalignment, slippage, abrasion, or termination failure—so combining them yields durable seams. Use this checklist during production or inspection to verify stitch security.
Best Way to Finish Leather Thread Ends
Compare finishing options by visibility, security, and material compatibility: hidden knots give the cleanest visible finish with high security for natural and waxed threads; backstitch locks deliver maximum hold where the termination can be visible; melt or burn finishes work for synthetic threads but require care to avoid leather damage. Choose the method that balances appearance and strength: hidden knot for visible, high‑quality pieces; backstitch for maximum hold on load‑bearing seams; and controlled melt only for specified synthetics. This approach ensures the finish matches both function and aesthetics.
Frequently Asked Questions
What types of thread are best for leather stitching?
Waxed polyester thread is the most common choice because it combines strength, abrasion resistance, and easy handling. The wax improves grip in holes and helps knots hold under repeated load. Nylon and natural threads are options in some applications, but they usually need more careful selection for strength and UV resistance. Match thread diameter and wax level to leather thickness and seam demands for best results.
How can I tell if my leather stitches are secure?
Check for consistent stitch spacing and even tension along the seam. Secure stitching shows no signs of fraying or loose ends, and knots or terminations are hidden or locked. The seam should hold its shape under a reasonable load without gaping. Regular visual and tactile checks catch problems early before they become failures.
What maintenance is required for leather stitches?
Keep leather clean and conditioned to prevent drying and cracking that can stress stitches. Inspect seams periodically for fraying or loose threads; trim and re‑secure minor issues promptly. Apply edge sealant where thread ends meet leather to reduce moisture ingress and abrasion. Proper care preserves both function and appearance.
Can I repair leather stitches myself?
Minor repairs are often doable at home with basic leatherworking tools. Use the same thread type and a saddle stitch or backstitch to reinforce or replace damaged seams. Match thread color and thickness to the original for the best visual result. For extensive damage or structural repairs, consult a professional leatherworker to ensure the item’s integrity is maintained.
What are the signs of stitch failure in leather goods?
Look for frayed threads, visible gaps, uneven stitch spacing, or tearing of the leather around holes. Loose or exposed knots and puckering along the seam are also warnings. If you spot these signs, repair or reinforce the seam quickly to prevent further damage.
How does the choice of stitching technique affect leather durability?
Stitch technique has a direct impact on longevity. Saddle stitching locks each stitch and provides redundancy, so a single break won’t unravel the seam. Machine lockstitch is faster but less redundant and can fail more visibly if one thread breaks. Pick the technique that matches the item’s expected load and use—saddle stitch for high stress, machine stitch for linings and low‑load areas.
Conclusion
Securing leather stitches is a practical combination of correct stitch choice, suitable materials, disciplined technique, and careful finishing. Techniques like saddle stitching, paired with quality waxed thread and consistent tooling and inspection, produce seams that last and look professional. If you want to improve your craft, specifying the right stitch, thread, and finishing steps—then verifying them during production—is the fastest route to durable, well‑finished leather goods. Explore our tools and resources to take your work to the next level and start making leather items that truly stand the test of time.


