
Professional Leather Repair Options

Professional leather repair: trusted services and reliable DIY kits for lasting results
Leather repair covers cleaning, patching, color-matching and structural fixes designed to extend the life and value of leather goods, furniture and vehicle interiors. This guide walks through how professional repair shops and mobile technicians work, which DIY kits give dependable outcomes, and when repair is the smarter, more sustainable alternative to replacement. You’ll find practical techniques for scratches, tears, burns and fading, realistic cost ranges for furniture restoration, and the limitations that different leather types (aniline, bonded, protected) impose. The article lays out step-by-step methods, compares professional and DIY results, and lists maintenance routines that keep repairs looking good longer—helping consumers and wholesale buyers make informed choices while reducing risk.
What are the best professional leather repair services available?
Professional leather repair providers assess damage, recommend the correct method and deliver color-matched, structurally sound results using industry-grade materials and controlled processes. Services range from mobile technicians who perform spot fixes and on-site reconditioning, to workshop restorers that handle sub-patching, re-dyeing or full reupholstery. The key advantage is predictability: experienced teams combine accurate assessment, manufacturer-grade products and careful color matching to restore appearance and strength while reducing the chance of obvious mismatches or premature failure. When choosing a provider, look for clear process descriptions, material knowledge and before-and-after examples to judge likely quality and turnaround time. Knowing the service types helps you pick the right approach and set realistic expectations for outcome and cost.
Professional services commonly offer these approaches:
- Mobile on-site repairs for surface damage and fast color blending that keep disruption to a minimum.
- Workshop restorations for structural repairs, sub-patching and full re-dyeing that need controlled conditions.
- Partial or full reupholstery when the substrate is damaged or wear is extensive.
Those service categories lead naturally into the next question: which leather items are typically restored and what outcomes you can expect.
Which leather products can be restored professionally?
Most leather items can be repaired: furniture (sofas, armchairs), apparel (jackets), accessories (bags, wallets) and automotive interiors (seats, door panels). Surface problems—scratches, scuffs and fading—are often corrected with cleaning, micro-fillers and color restoration; structural issues such as rips, edge separation or cushion collapse usually require sub-patching, stitching or partial reupholstery. Turnaround depends on scale: small accessories can be done in days, while full sofas or car seats may need weeks for dye curing and multiple finish coats. Realistic outcomes depend on leather type and damage level—some finishes accept near-seamless repair, while delicate aniline hides call for a conservative approach to avoid overworking the surface.
When you evaluate an item, factor in size and mobility: smaller pieces are quicker to restore, whereas furniture and interiors often need disassembly or workshop time for a durable result.
How does Pakistan Leather ensure quality in professional repairs?
Pakistan Leather brings manufacturing and export experience to repairs—deep knowledge of sheep, goat, cow and buffalo hides and proven color development skills that improve repair matches. As a manufacturer and exporter of premium leather garments and goods, the company applies hide selection, hand-stitching and color-matching practices in production; those same capabilities translate into careful repair work that respects original grain, texture and dye behavior. Manufacturing quality control—consistent color panels, hide grading and finishing checks—mirrors the verification steps used in restoration to confirm match and structural integrity. For wholesale or large restoration contracts, this manufacturing perspective helps align material sourcing, batch color matching and logistics expectations.
If you need a quote or a wholesale repair assessment, Pakistan Leather can evaluate leather type and scope and advise on feasibility and timelines through their e‑commerce contact channels.
What are the top DIY leather repair kits and how do they work?

DIY leather repair kits let you fix minor surface damage—light scratches, small scuffs and localized color loss—using cleaners, fillers and pigments. A typical kit guides you to clean the area, add a flexible filler or sub-patch behind holes, texture the surface to match grain, then apply pigments or dye and finish with a protective topcoat. Kits are cost-effective and convenient for non-structural problems, but results depend on pigment matching, correct filler choice for the leather type, and careful curing. For best results, practice on an unobtrusive spot first, choose kits with professional-grade pigments and flexible fillers, and know when damage is beyond DIY scope and needs a technician.
Key criteria when picking a kit are pigment range, filler flexibility, texture tools and clear instructions—these determine whether the repair looks natural and holds up or remains a temporary patch.
- Best uses: surface scratches, small punctures and localized fading.
- Not suitable for: large tears, seam failure or delaminated bonded leather.
- Prefer kits that include surface prep cleaner, blendable colorants and a finish topcoat.
Below is a comparison of typical kit types and what they include to help you choose the right DIY option.
| Repair Kit | Included Components | Best For / Damage Types |
|---|---|---|
| Basic Home Kit | Cleaner, basic pigment, sponge applicator | Light scratches, small scuffs, minor color touch-ups |
| Professional-Grade Kit | Prep cleaner, flexible filler, multi-shade pigments, texture paper, finish | Deeper scratches, small tears, color restoration on protected leather |
| Trade/Workshop Kit | Industrial-grade adhesives, sub-patch material, heat tool, full pigment set | Structural patches, edge repairs, frequent technician use |
That comparison shows why professional-grade and trade kits include parts that support longer-lasting, better-matched repairs versus basic home kits.
What components are included in professional-grade leather repair kits?
Professional-grade kits often contain a pH-balanced leather cleaner, a flexible leather filler compound, a selection of pigments or dyes for blending, texture sheets or grain pads, applicators (spatulas, brushes), adhesive for sub-patches and a protective topcoat. Each item has a clear role: cleaners remove oils so color bonds; fillers rebuild lost surface; pigments restore hue; texture tools recreate grain; adhesives secure sub-patches; and topcoats seal and protect. Quality signs include pigment permanence, filler flexibility (to avoid cracking) and clear layering and curing instructions. For delicate leathers, choose low-solvent pigments and gentle cleaners to prevent dye migration or surface harm.
The next section outlines the step-by-step use of these components for common issues like scratches and small tears.
How to use DIY kits for common leather damages like scratches and tears?
A dependable DIY workflow follows these steps: clean the area thoroughly; glue a prepared sub-patch behind holes or tears; apply flexible filler in thin layers to rebuild the surface; texture the filler to match grain while it’s still pliable; then blend pigments and seal with a topcoat. Troubleshooting tips: avoid overfilling (it looks bulbous), allow full cure between pigment coats to prevent smudging, and test pigments on a hidden area for color match. Work in a ventilated space and wear gloves when handling adhesives and pigments; practice on scrap material before tackling visible areas. If the repair needs structural stitching or large sub-patches, escalate to a professional to ensure longevity.
When DIY limits are reached—significant seam failure, large-area delamination, or delicate aniline hides—professional restoration is usually the more durable choice.
How much does leather furniture restoration cost and what factors affect pricing?
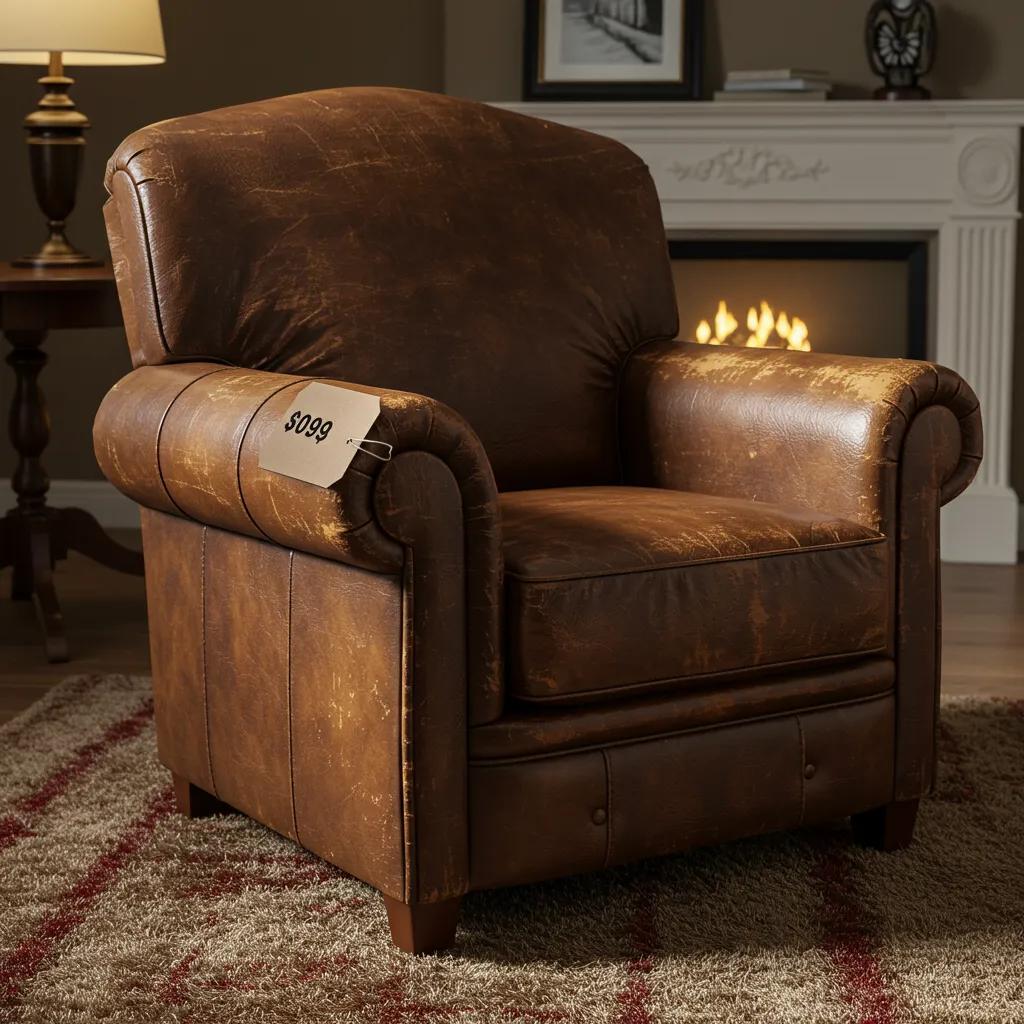
Restoration costs vary widely by damage type, leather class, area affected and whether work is done on-site or in a workshop. Minor surface fixes and color blending for a single cushion sit at the lower end, while structural repairs, full re-dyeing or reupholstery cost more due to labor, materials and drying time. Major price drivers include damage severity, leather finish (aniline vs coated), labor hours, custom color development and shipping or export handling for wholesale jobs. Turnaround ranges from 1–3 days for small surface repairs to several weeks for complete restorations that require dye curing and multiple finishing passes.
Common cost drivers include:
- Damage severity: surface scratches versus structural tears.
- Leather type: aniline and semi-aniline need more careful, time-consuming methods.
- Logistics: pickup, shipping or export handling adds cost and coordination time.
The table below maps typical damage to repair methods and representative cost/time ranges so you can gauge expected investment.
| Damage Type | Typical Repair Method | Typical Cost Range / Time Required |
|---|---|---|
| Minor scratches / scuffs | Clean, micro-fill, pigment touch-up | $50–$200 / 1–3 days |
| Small tears / holes | Sub-patch, layered filler, color match | $150–$450 / 3–10 days |
| Structural damage / reupholstery | Partial reupholstery or full re-cover | $500–$2,000+ / 2–6 weeks |
What types of leather damage influence repair costs?
Damage type drives complexity: scratches and light fading are straightforward with pigment and filler, while tears, seam separations and burns require sub-patching, stitching and multi-layer work that increase labor. Pet damage and burns are often pricier because they can affect underlying foam or remove large surface areas. Leather type also affects cost: porous aniline leathers need cautious color testing and slower methods, while coated or protected leathers accept stronger surface treatments. A thorough assessment should itemize material replacement, labor hours and finishing passes so quotes reflect the full restoration scope.
Knowing how damage maps to cost helps you decide whether repair delivers better lifecycle value than replacement.
How do professional repair services compare to DIY solutions in cost and quality?
Professionals generally produce longer-lasting, more consistent results because they use industrial-grade materials, controlled curing environments and experienced technicians; their repairs often outlast DIY fixes, especially for structural work. DIY is cost-efficient for minor surface damage and can delay bigger jobs, but DIY repairs may require rework sooner and can complicate later professional restoration if unsuitable materials were used. Consider ROI: for high-value or sentimental pieces, professional restoration often offers better long-term value despite higher upfront cost. Use DIY for routine upkeep and hire professionals for complex structural or color-critical restorations.
If unsure, get a professional assessment—an expert opinion can prevent costly DIY mistakes and clarify the right investment.
How can you repair different types of leather: aniline, bonded and protected?
Repair options depend on the leather’s finish and construction. Aniline leather is porous and dye-only, bonded leather is a composite prone to peeling, and protected (coated) leather has a pigmented surface that tolerates heavier restoration methods. Effective repairs respect these differences: aniline needs conservative pigment blending and minimal filling; bonded leather may only accept surface fixes or panel replacement because its top layer can delaminate; protected leathers accept fillers and re-coating but require careful grain and sheen matching. Set expectations by leather type so results are acceptable rather than chasing an invisible repair on unsuitable material.
The table below ties leather types to common issues and recommended solutions to summarize practical choices for restoration.
| Leather Type | Common Issues / Limitations | Recommended Repair Methods |
|---|---|---|
| Aniline / Semi-aniline | Porous dye finish, visible color variation, sensitive to solvents | Conservative pigment blending, minimal filler, expert color matching |
| Bonded / Reconstituted | Peeling, flaking, poor repair adhesion | Patch replacement or partial cover; replacement recommended for large areas |
| Protected / Coated | Surface scratches, abrasion but stable substrate | Fillers, texture matching, re-coating and color restoration |
What are the repair challenges for aniline and semi-aniline leather?
Aniline and semi-aniline leathers are prized for natural look but are porous and deeply dyed, which makes color matching tricky and aggressive solvents risky. Repairs should preserve the subtle, variable surface while restoring tone, so technicians often use multiple thin pigment layers and minimal filling to keep natural grain. Overworking aniline can cause patchy or glossy spots; conservative cleaning, spot testing and expert blending are essential. Successful aniline restoration focuses on minimal intervention and accepts slight visual differences to keep texture and depth intact.
Understanding these limits helps you choose conservative correction versus full re-dyeing under workshop conditions.
What are the limitations and best practices for bonded and coated leather repair?
Bonded leather is made from leather scraps within a polyurethane or PVC surface that can delaminate and flake; once the surface fails, seamless restoration is often impossible, and patching or panel replacement is the most durable option. Coated or protected leathers that remain intact can be filled and re-coated, but matching sheen and grain requires specialist products and occasionally replacement panels for large areas. Best practices: test adhesion on a small area, avoid aggressive sanding that removes composite layers, and recommend panel replacement when flaking runs beyond a repairable patch. For bonded constructions, replacement is often the pragmatic, long-term choice.
These realities guide cost-benefit decisions about conservative repair versus full panel replacement.
What are the most effective techniques for repairing common leather damages?
Effective leather repair follows a layered workflow: clean the surface, stabilize and seal edges, add sub-patches for structural support, build the surface with layered flexible fillers, texture to match grain, then perform color restoration and protective finishing. Typical materials include pH-neutral cleaners, flexible fillers, professional pigments/dyes, leather adhesives, texture papers and abrasion-resistant topcoats. Solving common problems—visible seams, pigment mismatch, filler cracking—depends on correct curing time, thin successive filler layers and gradual color blending. These techniques produce repairs that balance appearance with durability for most leather issues.
The following sections separate surface fixes from structural solutions.
How to fix leather scratches, scuffs and fading?
Begin with a gentle leather cleaner to remove oils and contaminants that block adhesion. For light scratches, apply a flexible micro-fill and smooth carefully, then blend pigments in thin coats until the tone matches the surrounding area; finish with a low-gloss protective topcoat to restore sheen and abrasion resistance. For fading, use matched colorants in transparent layers to rebuild depth while preserving natural variation. Leather conditioners can reduce the look of minor scuffs but won’t replace pigment and filler where the dye layer is gone.
Consistent layering, spot testing and patient curing produce natural-looking, durable surface restorations.
What are the best solutions for tears, holes and burns in leather?
Structural repairs start with a sub-patch behind the damaged area to give a stable foundation; the patch is fixed with leather-appropriate adhesive and trimmed close to the edge. Layered flexible filler rebuilds the profile and is sanded or textured to match grain; tears may also need edge stitching or hand-stitch reinforcement to restore strength. Burns that remove surface and substrate require careful removal of compromised fibers, sub-patching, layered fill and sometimes panel replacement. Durability depends on proper sub-patch adhesion, filler flexibility and finishing—professional intervention is recommended when the repair must bear tension or heavy wear.
When major structural work is required, workshop conditions and specialist materials deliver the most durable results.
How to maintain and care for leather to prevent future damage?
Preventive care is the most cost-effective way to extend leather life and protect repair investments. A simple routine includes cleaning with a leather-specific cleaner, conditioning to restore surface lipids and suppleness, UV protection for sun-exposed items, and correct storage to avoid humidity and temperature extremes. Maintenance frequency depends on use: high-contact furniture and automotive interiors need more frequent conditioning and inspection than seldom-used accessories. Proper care preserves color, prevents cracks and delays repairs—making routine maintenance an essential part of leather stewardship.
Use the short regimen below for most leather types.
- Clean every 3–6 months with a pH-balanced leather cleaner for routine maintenance.
- Condition every 6–12 months to keep leather supple and prevent drying.
- Shield leather from direct sunlight and sharp temperature or humidity swings to avoid fading and cracking.
Regular care improves repair longevity because well-conditioned leather flexes with movement and holds color and topcoats better.
What are the recommended cleaning and conditioning practices?
Use a pH-neutral leather cleaner and a soft cloth to lift dirt and oils without stripping dyes; avoid household detergents or solvents that can damage finishes. Conditioners with emollients and mild preservatives restore surface lipids—apply a thin layer, let it absorb, then buff to prevent build-up. For delicate aniline leathers, reduce frequency and use lighter formulations; protected leathers tolerate more robust cleaners and conditioners. Always spot-test products in an inconspicuous area and follow the manufacturer’s instructions.
Good cleaning and conditioning habits minimize micro-cracking and color loss, reducing how often restorative work is needed.
How does proper leather care enhance repair longevity?
Regular maintenance preserves the substrate and finish so repairs bond better and last longer; conditioned leather shows fewer micro-fractures that can undermine repairs. In practice, well-maintained furniture keeps repaired color and filler intact without rapid edge cracking, while neglected pieces see repairs fail sooner because the leather is dry and brittle. Schedule inspections after a repair—especially in the first months—to catch small issues before they grow. Proper follow-up care multiplies the value of professional restoration by extending both aesthetic and structural results.
Ongoing care after a repair ensures your restoration investment continues to pay off over the leather item’s life.
Frequently Asked Questions
1. What are the signs that leather needs repair?
Look for visible scratches, scuffs, fading, tears or structural problems like cushion collapse. Dry, brittle leather also indicates a need for conditioning or repair. Peeling or flaking—common in bonded leather—is a clear sign you should consider professional help. Regular inspections let you catch issues early, enabling timely repairs that prevent further damage and extend the life of your leather items.
2. Can all types of leather be repaired using the same methods?
No. Each leather type needs specific methods because of its construction and finish. Aniline leather is porous and requires careful color matching and minimal filling to keep its natural look. Bonded leather often only accepts surface fixes or panel replacement because of its composite nature. Protected (coated) leather tolerates fillers and re-coating but still needs precise grain and sheen matching. Identifying the leather type is essential to choose the right repair approach.
3. How can I choose between professional repair services and DIY kits?
Decide based on damage extent and your comfort with repair work. DIY kits are cost-effective for minor surface defects like scratches or small scuffs. For structural damage, extensive wear or high-value items, professional services are recommended for durable, high-quality results. Consider the item’s replacement cost and sentimental value—those often tip the balance toward professional restoration.
4. What maintenance practices can help prevent leather damage?
Establish a routine: clean with a pH-balanced leather cleaner every 3–6 months and condition every 6–12 months. Protect leather from direct sunlight and extreme temperature changes, and store items in a cool, dry place to avoid humidity problems. Regular maintenance preserves appearance and improves the longevity of any repairs made.
5. Are there specific products recommended for cleaning and conditioning leather?
Use products formulated for leather. Choose pH-neutral cleaners that remove dirt and oils without harming the finish, and conditioners with emollients and mild preservatives to restore moisture and suppleness. Avoid household cleaners or solvents that strip dyes. Always test any product on an inconspicuous area first to check compatibility with your leather.
6. How long can I expect a professional leather repair to last?
Longevity depends on leather type, damage extent and materials used. Well-executed repairs can last several years, especially with proper maintenance. Structural repairs are more durable when high-quality materials and techniques are used. Regular care will further extend the life of the repair.
7. What should I do if a DIY repair doesn't turn out as expected?
First, assess whether the repair can be improved with touch-ups. If the result is unsatisfactory or the damage is extensive, contact a professional leather repair service for evaluation and a permanent solution. Be aware that some DIY attempts can complicate later professional work, so seek expert help when needed.
Conclusion
Choosing professional leather repair or a high-quality DIY kit can keep your leather goods looking and performing their best. By understanding repair options, costs and care routines, you can make decisions that extend the life and value of your leather items. Whether you hire a pro or tackle small fixes yourself, the right approach pays off. Explore our resources to find the best restoration path for your leather today.


