
Methods for Embossing Leather
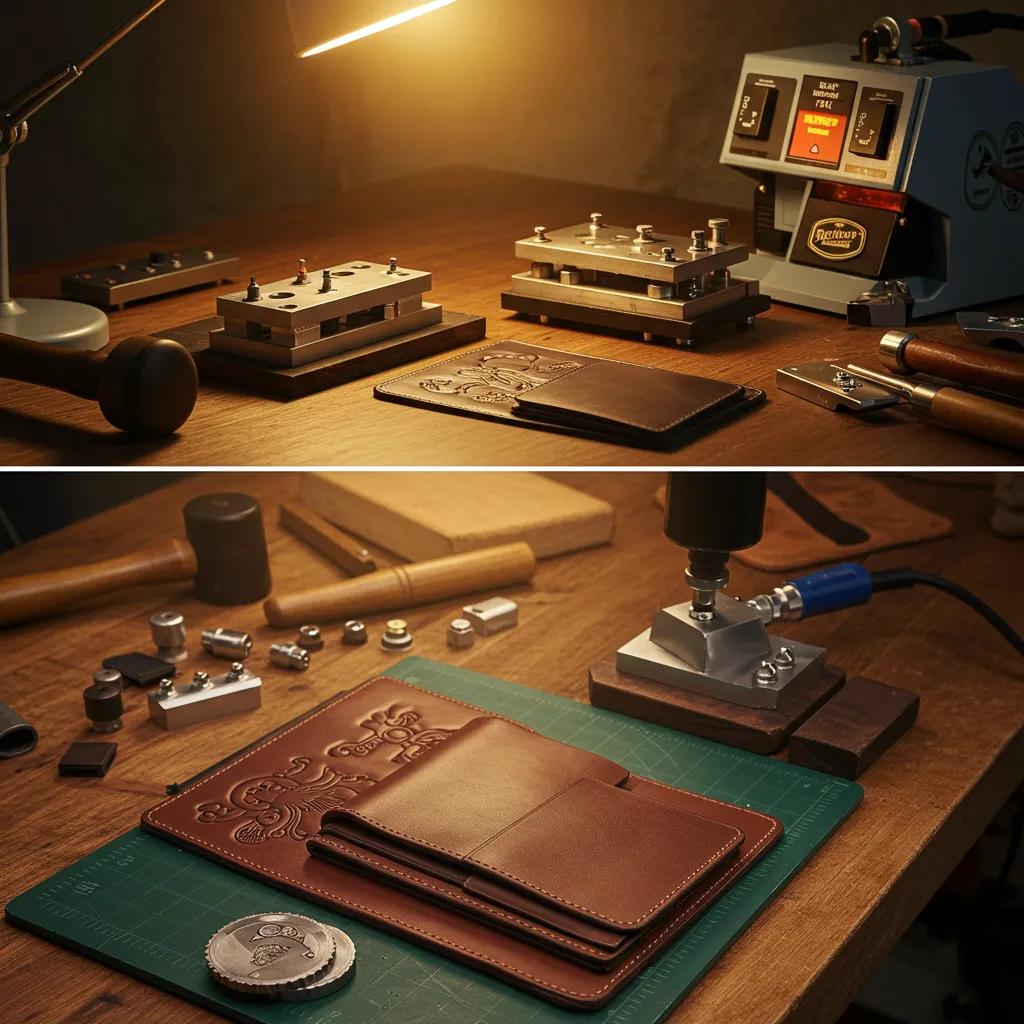
Methods for Embossing Leather — A Practical Guide to Techniques, Tools & Custom Services
Leather embossing shapes a raised or recessed design into leather using pressure, heat, or molding. Common approaches include blind embossing, foil (hot) stamping, heat embossing, and wet molding. This guide explains how each method works, which hides and tannages respond best, and the practical steps to get consistent, clean results—from small wallets to full jackets. You’ll find advice on preparing leather, selecting the right tools and dies, and matching technique to material. We also cover how custom embossing services scale craftsmanship for brands and individuals. Terms such as leather stamping, leather monogramming service, and hot stamping leather designs are used throughout to help designers, hobbyists, and buyers make informed choices. Next, we break down the most popular embossing techniques and the visual effects each produces.
What Are the Most Popular Leather Embossing Techniques?

Embossing alters leather’s surface by compressing or reshaping fibers with pressure, heat, or moisture. Each method creates a distinct look and feel best suited to certain products and hides. Blind embossing relies on pressure for a subtle, tonal mark; foil or hot stamping uses heat and foil for high-contrast logos. Heat embossing and wet molding change leather memory to produce deeper or three-dimensional forms. Techniques scale differently—from hand-stamping for one-offs to hydraulic presses for production runs—so choose a method that meets your visual goals (visibility, durability, or subtlety) while protecting the hide. Below is a concise comparison to help you evaluate options quickly.
Blind embossing produces a low-relief impression without color by pressing a metal die into the leather. It uses pressure—and sometimes light heat—to compress fibers so the design is visible through shadow rather than pigment. A hardened metal stamp (die) and a press or mallet create the mark, and this method performs best on vegetable-tanned and firm-grain leathers that hold crisp edges. Blind embossing yields an elegant, tonal finish that resists wear and keeps a handcrafted look. Because the effect depends on leather memory, careful casing and controlled pressure are essential to achieve consistent results across production runs.
Foil embossing, often called hot stamping, combines pressure and heat to transfer a thin metallic or pigmented foil onto the surface while embossing a design. A heated die activates an adhesive in the foil so color or metallic finish bonds to raised or recessed areas, creating a durable, eye-catching mark used on wallets, labels, and packaging. Foil choice—metallic, pigment, or holographic—affects both look and wear characteristics: metallic foils have high shine but may show abrasion on frequently handled edges. Successful foil embossing depends on accurate temperature control and compatible finishing to avoid cracking or adhesion failures.
Different embossing methods suit different visual aims and product classes. The table below summarizes key attributes to help you select the approach that matches both design intent and leather choice.
| Technique | Process Summary | Best For (leather types) | Visual Effect | Typical Uses |
|---|---|---|---|---|
| Blind embossing | Pressure (sometimes light heat) with metal die | Vegetable-tanned, firm cowhide | Subtle, tonal relief | Monograms, internal labels, premium branding |
| Foil / hot stamping | Heated die transfers metallic/pigment foil + pressure | Smooth cowhide, goat, veg-tan | High-contrast metallic or pigmented mark | Wallets, logos, labels, accent trim |
| Heat embossing | Temperature + pressure reshape fibers | Veg-tanned, thicker hides | Crisp, deep impressions | Belts, larger bags, structured goods |
| Wet molding / molding embossing | Moisture + form applied to leather shape | Vegetable-tanned, sheepskin for shaping | 3D forms, deep contours | Shoe components, molded pouches, sculpted accents |
This comparison shows how technique choice balances material response and design goals, and it narrows the tooling and prep decisions for the next stage.
How to Emboss Leather: Step-by-Step Process and Preparation Tips
Reliable embossing starts with careful preparation, the right die and pressure, and measured finishing so impressions stay crisp and repeatable. The basic workflow begins with finalizing the design, moves through casing or dampening the hide, continues with precise die alignment and stamping or pressing, and ends with conditioning and protective finishes. Close attention to moisture content, heat settings, and die geometry prevents common problems like blowouts, uneven impressions, or foil lift. Below is a practical workflow that hobbyists and production teams can adapt to scale consistency and quality.
Before you stamp, prepare the leather so it accepts and retains the impression: case vegetable-tanned pieces to a slightly firm, tacky state and lightly dampen softer leathers for shallow impressions. Work in a controlled environment with stable temperature and humidity to keep results consistent. Always test on a scrap piece that matches thickness and finish to dial in pressure and heat settings. Proper preparation avoids over-saturation or under-casing—both of which harm detail and durability.
Follow this numbered process for a standard stamping workflow:
- Finalize the artwork and produce a vector die file or a handcrafted stamp scaled to the product.
- Prepare the leather by casing or light dampening, then rest it until surface tension is even.
- Align the die, set press parameters (pressure, dwell time, and temperature if using heat).
- Perform the controlled stamp or press, then let the leather cool and settle before finishing.
- Finish with a pH-neutral conditioner and, if required, a sealant compatible with any foil used.
Testing at each step protects quality, reduces waste, and speeds approval cycles for larger orders.
Pakistan Leather’s production setup lets projects move from prototype to batch manufacturing when you need custom colors, hand-stitched details, or Pantone-accurate finishes. As a manufacturer and exporter of premium leather garments and accessories, Pakistan Leather translates vector-ready designs into embossed jackets, bags, wallets, and belts and can support Pantone color matching for dyes and finishes. Designers and buyers requesting custom embossed runs can start discussions via the company website or the business profile to review materials, prototyping, and scale options. This collaborative workflow preserves design intent while enabling repeatable production.
Which Types of Leather Are Best Suited for Embossing?
Material choice determines how well a hide will hold an impression: some leathers respond to pressure and heat with crisp edges, while others will compress and lose detail. Vegetable-tanned leathers have tighter fiber structure and “memory,” producing clear, deep impressions ideal for blind embossing and wet molding. Chrome-tanned and softer garment leathers generally accept shallower, subtler textures. Grain, thickness, and tannage all matter—matching these factors to your technique ensures embossing enhances the leather without damaging it.
Different leathers respond predictably to embossing; this table highlights grain, embossing response, and recommended uses.
| Leather Type | Grain / Texture | Embossing Response | Pros | Cons |
|---|---|---|---|---|
| Cowhide (full-grain) | Tight, durable grain | Excellent for deep embossing | Durable, holds detail for large items | Thicker, requires higher pressure |
| Goatskin | Natural pebbled grain, supple | Good for fine detail and small impressions | Soft drape, good detail on small goods | May show grain variation |
| Sheepskin / lambskin | Smooth, supple | Best for shallow, subtle emboss | Comfortable for garments, fine texture | Not for deep or structural embossing |
| Buffalo | Coarse, textured | Accepts rugged, textured embossing | Strong visual texture, durable | Grain can obscure fine detail |
| Vegetable-tanned | Varies by cut, firm memory | Ideal for crisp, deep impressions | Takes coloring and tooling well | Requires careful casing and finishing |
Comparing these attributes helps you specify the right hide during prototyping; the correct material choice reduces revision cycles and preserves design fidelity.
Pakistan Leather sources and works with a wide range of hides—including sheep, goat, cow, and buffalo—and has experience producing vegetable-tanned leathers tailored for custom embossing. That material expertise helps clients make informed choices during sampling and ensures selected hides match the intended embossing technique and end-use durability. Designers ordering custom embossed runs benefit from our sourcing knowledge when specifying grain, tannage, and Pantone-matched finishes for a cohesive final product.
How Do Cow, Goat, Sheep, and Buffalo Leather Differ for Embossing?
Cowhide gives structure and holds depth well, making it suitable for belts, large bags, and pieces that need deep, repeatable impressions; its thickness tolerates stronger dies and industrial presses. Goatskin and sheepskin have softer grain and better drape, which is ideal for fine detail on wallets, garment panels, and accessories—but they require gentler pressure and finer dies. Buffalo’s coarse grain creates bold, rustic impressions that suit rugged accessories and outerwear where texture is a feature. Matching design scale to hide characteristics prevents overworking the leather and keeps impressions clear through production.
Why Is Vegetable-Tanned Leather Preferred for Custom Embossing?
Vegetable-tanned leather responds predictably to casing, heat, and pressure because tanning bonds give the hide a fiber structure with “memory” that holds crisp edges and fine lines. This tannage also accepts dyes and finishes in ways that maintain color fidelity—important for Pantone color matching and brand consistency. Vegetable-tanned hides commonly used for bespoke embossing let you achieve deep impressions without delamination and can be finished with protective topcoats compatible with foil stamping. For custom, long-lasting embossing, vegetable-tanned selections often speed prototyping and improve the final result.
How Can Custom Leather Embossing Services Elevate Your Brand or Personal Style?

Custom embossing turns logos, monograms, and patterns into tactile, permanent marks that communicate quality and attention to detail. For brands, consistent embossing across wallets, bags, and jackets strengthens identity and allows flexible treatments—blind, foil, or heat embossing—based on placement and product type. For individuals, bespoke monograms and patterns turn leather pieces into personal keepsakes that age beautifully. Below are the main ways custom embossing adds value for both retail and wholesale clients.
Custom embossing is particularly valuable for three outcomes:
- Brand differentiation: A consistent embossed logo or pattern signals craftsmanship and helps products stand out in store or online.
- Personalization: Monogramming and custom details add emotional value and create collectible gifts or limited editions.
- Functional marking: Embossing can carry care codes, serial numbers, or ownership marks to support traceability and after-sales service.
Pakistan Leather (also known as Atlanta Enterprises) operates as a manufacturer-exporter capable of integrating custom embossing into production runs for high-end fashion leather garments and goods. We specialize in custom, hand-stitched items—leather jackets, bags, wallets, belts, and accessories—and offer Pantone color matching for dyes and finishes when brand color fidelity is required. Wholesale and export clients follow a clear process—design submission, material selection, sample approval, and scaled production—and prospective buyers can inquire via the company’s website or business profile to request quotes and discuss prototyping.
Use the practical checklist below when preparing a custom embossed order.
When preparing to order custom embossed goods, follow these steps:
- Prepare design assets: Supply vector files (SVG, AI, or EPS) for logos and clear Pantone references if color matching is required.
- Specify materials: Choose leather type and tannage (for example, vegetable-tanned for crisp impressions) and state preferred grain and thickness.
- Request prototyping: Approve a physical sample or strike-off to verify impression depth, foil adhesion, and color before bulk production.
- Confirm production parameters: Agree on finishing, stitching details, and packaging to ensure consistent results across the run.
This ordering workflow reduces revisions and clarifies expectations between designer and manufacturer, making scale-up predictable and quality-driven.
What Are the Best Practices for Maintaining and Caring for Embossed Leather?
Good care preserves embossed detail by preventing flattening, color loss, and edge wear. Maintenance combines gentle cleaning, measured conditioning, and sensible storage to keep impressions crisp. Embossed areas trap dust in recesses while raised areas receive most handling—targeted cleaning and light conditioning keep both balanced. Avoid greasy or solvent-based products that can darken finishes or weaken foil adhesives; instead use pH-neutral cleaners and creams formulated for the leather type. The checklist below outlines routine maintenance to protect embossed surfaces and maintain brand appearance.
Routine maintenance for embossed leather should include:
- Dust removal: Use a soft brush or dry microfiber to clear dust from recesses before any wet cleaning.
- Gentle cleaning: Apply a pH-neutral leather cleaner sparingly with a soft cloth; avoid excess moisture that can swell and flatten impressions.
- Light conditioning: Use a cream conditioner applied evenly to retain suppleness without saturating embossed areas.
Regular, light maintenance prevents heavy restorations that can change impressions or finishes; schedule cleaning and conditioning based on use, and always test products on a hidden panel first. For storage, keep embossed items upright in dust bags, avoid stacking heavy objects on embossed surfaces, and protect pieces from prolonged sunlight or heat that can dry leather and reduce contrast.
For clients who want guided after-sales support, Pakistan Leather provides follow-up care guidance and maintenance recommendations for wholesale accounts to preserve embossed detailing across inventory. Retail and wholesale buyers can request long-term care instructions or maintenance kit suggestions through the company website or business profile to help products retain their intended appearance over time.
How Should You Clean and Protect Embossed Leather Goods?
Cleaning embossed leather starts with removing surface dust from recesses, using minimal moisture, and conditioning evenly to avoid flattening. Begin by brushing the pattern with a soft bristle brush to dislodge debris. Next, apply a small amount of pH-neutral leather cleaner to a soft cloth and work gently across the pattern—avoid saturating the leather and wipe along grain lines when possible. After cleaning, apply a light, even layer of conditioner and buff gently—over-conditioning can darken recessed areas and reduce contrast. For foil-debossed items, choose products without solvents and avoid abrasive cleaners to prevent foil lifting.
What Are Common Mistakes to Avoid When Handling Embossed Leather?
Certain handling errors speed wear or blur embossing clarity. Don’t stack heavy items on embossed surfaces, and never use harsh solvents that strip finishes or foil adhesives. Avoid applying direct heat (hairdryers, lamps) to speed drying—rapid temperature changes can warp impressions and crack finishes. Do not over-condition or saturate embossed areas; conditioning should restore suppleness, not fill recessed details. When issues arise, spot-test cleaners, store items in dust bags, and separate embossed goods during transport to avoid crushing.
What Tools and Equipment Are Used in Different Leather Embossing Methods?
Embossing tools range from simple hand-stamps and mallets to hydraulic presses and heated platens. Tool choice depends on scale, desired depth, and material. Metal dies and hand-stamps suit small batches and artisanal work, while industrial presses and programmable heating elements provide repeatability for wholesale production. Modern digital tools like CNC-engraved dies or laser cutters produce precise dies, and hobbyist devices such as Cricut machines can add light texture to thin leathers but lack the pressure and heat control needed for professional embossing. Understanding each tool’s role helps you plan investment for prototypes or larger runs.
Essential tooling for embossing fits into three categories: die and design creation, hand tools for low-volume work, and machines for consistent production. The table below summarizes common tools, use cases, and recommended scales.
| Tool / Equipment | Role in Process | When to Use | Scale (handmade vs. industrial) |
|---|---|---|---|
| Metal stamp / die | Transfers design under pressure | Small to medium designs; crisp edges | Handmade to small-batch |
| Hydraulic / platen press | Applies uniform pressure ± heat | High-repeatability production | Industrial |
| Heated die / heating platen | Activates foil adhesion | Foil stamping and heat embossing | Industrial to mid-scale |
| Mallet & hand tools | Localized stamping and finishing | Artisan monograms, repairs | Handmade |
| Digital CNC die engraving | Precise die production | Complex vector designs | Prototype to industrial |
Choosing the right mix of tools ensures your technique and material align with production needs and design tolerances.
How Do Metal Stamps, Pressing Machines, and Mallets Work in Embossing?
Metal stamps and dies act as the negative of a design; when pressed into leather they displace and compress fibers to form a raised or recessed image. The die’s hardness and profile determine edge clarity. Pressing machines apply uniform pressure and, with heating elements, enable foil transfer and consistent depth across many pieces—this is the backbone of repeatable quality for wholesale orders. Mallets and hand tools serve small-scale or detailed work where local control is required; they depend on operator skill for consistency and suit bespoke or artisanal pieces. Regular maintenance and calibration of presses and dies maintain dimensional accuracy and avoid variation between impressions.
Can Modern Tools Like Cricut Machines Be Used for Leather Embossing?
Cricut and similar cutters can be adapted for shallow textures and cut patterns on thin leathers, offering hobbyists an affordable way to personalize pieces. However, they lack the force, temperature control, and dwell-time precision needed for deep embossing or reliable foil transfer. For thin, vegetable-tanned scraps or decorative surface scoring, a Cricut can work, but for professional-grade monogramming, metal dies and heated presses remain the standard. Hobbyists using digital tools should pair them with manual finishing techniques and test leather thickness limits to avoid blade damage or inconsistent results.
- Start with compatible materials: Use thin, firm vegetable-tanned leather for best results with hobby tools.
- Test and iterate: Try multiple passes and adjust blade depth and pressure settings on scrap pieces.
- Upgrade when scaling: Move to metal dies and platen presses when repeatability and depth become priorities.
These steps help hobbyists bridge the convenience of digital design and the quality of professional embossing.
Frequently Asked Questions
What is the difference between blind embossing and foil embossing?
Blind embossing uses pressure alone to create a subtle, tonal impression that’s visible through shadow rather than color—ideal for understated monograms and premium branding. Foil embossing pairs heat and pressure to bond metallic or pigmented foil to the surface, producing a high-contrast, attention-grabbing finish. Each method serves different aesthetic and durability goals.
How can I ensure the best results when embossing leather?
Start with correct leather preparation—case or lightly dampen as appropriate—and test die alignment, pressure, and temperature on a matching scrap. Work in a controlled environment with stable temperature and humidity, follow a consistent stamping process, and condition the leather after embossing to preserve the impression and durability.
What types of designs work best for leather embossing?
Simple, bold designs with clear lines translate best to embossing. Intricate details can lose clarity—especially on thicker hides—so logos, monograms, and geometric patterns are commonly successful. Match design scale to the product: larger items can accept more detail, while smaller goods benefit from cleaner, simpler motifs.
Can I emboss leather at home, and what tools do I need?
Yes. For hand-stamping you’ll need a metal stamp or die, a mallet, and a firm vegetable-tanned leather piece. For more consistent or deeper impressions consider a hydraulic press or heated die. Maintain a stable workspace for temperature and humidity, and practice on scraps before working on final pieces.
What maintenance is required for embossed leather products?
Caring for embossed leather means regular cleaning and light conditioning. Remove dust from recesses with a soft brush, use a pH-neutral cleaner sparingly, and condition lightly to maintain suppleness without filling the impressions. Store items upright in dust bags and avoid heavy stacking to prevent flattening. Routine care extends the life and appearance of embossed goods.
How does the choice of leather affect the embossing process?
The hide strongly influences embossing outcomes. Vegetable-tanned leather holds crisp impressions and is best for deep embossing. Softer leathers like sheepskin accept shallower impressions. Grain, thickness, and tannage all affect how a leather responds to pressure and heat, so picking the right hide is essential for the desired look and durability.
What are the benefits of using custom embossing services for businesses?
Custom embossing helps businesses reinforce brand identity and differentiate products. Embossed logos and patterns add perceived value and craftsmanship. Personalization options make products more desirable as gifts or limited editions, while functional embossing—care codes, serial numbers—supports traceability and after-sales service. Overall, custom embossing enhances both presentation and utility.
Conclusion
Mastering leather embossing boosts both the look and perceived value of your products. Knowing which materials and methods work best ensures your designs retain clarity and durability. Custom embossing services let you produce consistent, on-brand pieces that resonate with customers and stand up to daily use. Begin exploring embossing techniques and partner with experienced manufacturers to bring your designs to life.


