
Common Embossing Problems

Common Embossing Problems: Identify, Prevent and Fix Leather Embossing Mistakes
Embossing presses a design into leather using a die, pressure and sometimes heat. When the process is controlled, the result is a crisp, long-lasting mark that raises perceived value and reinforces brand identity. This guide walks through the common embossing faults — what they look like, why they happen, and practical process controls that restore sharp lines, consistent depth and dependable foil adhesion. You’ll get clear cues for spotting defects (uneven depth, soft edges, burn marks, foil loss, mis-registration and cracking) plus step-by-step fixes operators and QA teams can use right away. The workflow follows identification to prevention: pressure and calibration, surface prep, temperature and die care, moisture control, material choice and targeted repairs. Quick-reference tables and checklists make it easy to put improvements into production. For manufacturers and buyers, the leather-type section compares vegetable-tanned, full-grain, corrected-grain and softer hides (sheep, goat, cow, buffalo) so you can match material to intended longevity and finish. This resource also supports our sales and export work by demonstrating manufacturing capability, quality control and product reliability.
What Are the Most Common Leather Embossing Problems?
Most embossing faults are visible and traceable to material limits, tooling condition or process setup. Spotting them early cuts scrap and rework. Typical defects are uneven embossing, faded or blurred impressions, post-emboss cracking, burn marks, foil flaking, misalignment and dies that stick — each with visual signs operators can use during inspection. Linking those signs to likely causes (uneven pressure, worn dies, wrong temperature, unsuitable leather or surface contamination) lets teams take targeted corrective action. The short list below helps technicians and designers map what they see on a finished piece to the next troubleshooting step.
Common embossing defects and quick identification cues:
- Uneven embossing: Some areas read shallow while others are deep — usually a sign of uneven platen pressure or incomplete die contact.
- Blurred or faded embossing: Soft, fuzzy edges around lines — often from incorrect temperature, dulled die edges or low-density leather.
- Cracking after embossing: Fine fractures radiating from deep impressions — commonly caused by brittle finishes, over-embossing or insufficient finishing.
- Burn marks or scorching: Dark discoloration limited to the embossed area — typically caused by excessive heat or too long a dwell time.
- Foil flaking: Partial loss of metallic or colored foil from the impression — points to poor adhesion or a contaminated surface.
- Misalignment and double-impression: Shifted or ghosted designs — usually the result of die slippage or inadequate fixturing.
- Sticking dies: Material adhering to the die on release — indicates lack of release agent, residue build-up or die-surface irregularities.
Use these visual cues to drive a focused inspection of pressure, temperature, die condition and surface prep. Early recognition narrows the troubleshooting scope, lowers wasted cycles and helps keep production on schedule.
Which Issues Cause Uneven Leather Embossing?

Uneven embossing happens when pressure, die contact or the leather surface aren’t uniform across the stamping area, producing inconsistent depth that undermines quality. Mechanically, common causes are a misaligned platen or press, warped or dirty pressure plates, or dies with non-flat backfaces that prevent even force transfer. Material factors — local thickness variation, uneven conditioning or surface folds — also break die contact. Use a checklist-driven inspection: check platen flatness, test with a feeler gauge or profile grid, verify die backface flatness and measure hide thickness. Regular calibration and a short pilot stamp before full runs catch issues early, reduce rework and extend tool life.
What Leads to Blurred and Faded Leather Embossing Designs?
Blurred or faded impressions occur when the die doesn’t transfer a sharp edge or when the leather can’t hold the detail. Causes include rounded or nicked die edges, wrong temperature or dwell for hot stamping, low pressure, or leathers with low fiber density that relax after stamping. Surface contamination — oils, release residues or dust — can also prevent full contact and soften lines. Immediate fixes: polish or re-sharpen the die, raise local pressure or dwell in small controlled steps, clean the die and leather, and choose a denser leather or adjust conditioning so the hide accepts and retains a deeper impression. These steps restore line definition and improve legibility over time.
How Can You Prevent Uneven Leather Embossing and Stamping Defects?
Preventing uneven embossing is a mix of routine machine calibration, consistent surface preparation and operator checks that guarantee repeatable die-to-leather contact. Focus on three pillars: mechanical alignment and press calibration, standardized leather conditioning and surface prep, and in-line verification during setup and production. Put a calibration schedule in place, use alignment tools and a platen-parallelism gauge, and always run pilot stamps on sacrificial stock before a full production run. The checklist and table below give concrete actions and machine/process parameters operators should monitor and standardize.
- Calibrate platen parallelism: Confirm platen flatness before each major run so pressure distributes evenly.
- Perform pilot stamps: Validate pressure, temperature and dwell on sacrificial pieces before committing to production.
- Condition leather consistently: Bring hides to a uniform moisture level using a standard conditioner and timed equilibration.
- Inspect die backface and edges: Keep dies flat and edges sharp for even contact and clear transfers.
- Clean surfaces thoroughly: Remove oils, dust and residues from both die faces and leather before stamping.
These preventive steps form a repeatable protocol that cuts operator variability and shortens setup time. Standardizing practice turns one-off fixes into predictable results, enabling faster scale-up and fewer rejections.
| Machine/Process | Parameter | Recommended Practice |
|---|---|---|
| Platen/Press | Pressure distribution | Check platen parallelism with a feeler gauge; adjust shims until contact is uniform. |
| Embossing Die | Backface flatness | Inspect and grind flat when needed; use a flatness gauge during setup. |
| Calibration | Frequency | Run alignment checks at start of day and after maintenance or any die change. |
| Leather Prep | Moisture equilibration | Condition hides to a consistent moisture target using a documented recipe and timed equilibration. |
| Surface Cleaning | Contaminant removal | Clean die faces and leather with approved solvent or lint-free cloth before each run. |
This quick-reference table links machine and process settings to practical checks operators can use to prevent uneven embossing. Consistent application raises first-pass yield and protects tooling investments.
What Role Does Pressure and Machine Calibration Play in Preventing Uneven Imprints?
Pressure and calibration are central because embossing is the transfer of detail through controlled force — uneven pressure produces shallow and deep zones within the same part. Platen evenness, press frame rigidity and die backface uniformity determine how force spreads; any mechanical play or a warped platen causes inconsistent impressions. Recommended routine actions: a quick daily check of platen parallelism, full calibration after die changes and use of a calibrated dummy die for pressure mapping. Record calibration results and verify with a short test stamp so settings are traceable. Consistent calibration reduces variability and shortens troubleshooting time when defects appear.
How Does Leather Surface Preparation Affect Embossing Quality?
Surface preparation ensures the die contacts a clean, even substrate — a prerequisite for precise impressions and reliable foil adhesion. Prep covers cleaning, light leveling or burnishing to remove nap, and the application of conditioners or primers that even moisture and surface tension. Poor cleaning leaves oils or dust that block full die contact and cause fuzzy impressions or foil flaking; over-conditioning adds excess moisture that softens the hide and blurs details. Recommended tools: soft brushes, lint-free cloths, measured conditioners and a timed equilibration rack. A documented surface-prep SOP reduces batch variability and helps produce consistent embossing across product formats.
What Causes Blurred Lines and How Can You Achieve Crisp Leather Embossing?
Blurred lines result from a mix of tooling wear, unstable thermal control, incorrect dwell time or unsuitable leather selection. Crisp embossing needs tight control of these variables. Sharp detail depends on die-edge definition, stable temperature control for hot stamping, correct dwell time for fibers to set, and leather with enough fiber density and an elastic finish to retain impressions. The sections below explain the roles of temperature and die care and why moisture content is a critical control, with practical maintenance routines and conditioning checks that help secure clarity.
How Do Temperature and Die Maintenance Impact Embossing Clarity?
Temperature and die condition work together: the right temperature softens the leather surface just enough for fiber compaction without scorching, and a clean, sharp die transfers crisp edges. Too high a temperature or excessive dwell creates scorch marks or fiber breakdown, collapsing fine detail; too low yields shallow, indistinct impressions. Die maintenance — regular cleaning, residue removal and inspection for nicks — preserves edge definition. Set a maintenance cadence: clean dies after each shift, light polish weekly and inspect edges before large runs. Track wear so you know when to regrind or replace dies before blurring becomes irreversible.
Why Is Leather Moisture Content Critical for Sharp Embossing?
Moisture controls fiber pliability and the hide’s ability to accept and hold an impression. Too little moisture makes leather brittle and prone to cracking; too much softens fibers and produces blurred lines. Proper conditioning equalizes moisture so the die forms a stable impression that sets as the leather cools or dries. Quick readiness checks — a flex test, a fingertip pressure impression and a pilot stamp — show whether conditioning time is sufficient. Standardize conditioning recipes (product, amount, exposure time) for each leather type and control shop humidity to reduce environmental variability.
Which Leather Types Are Best for Durable and Long-Lasting Embossed Designs?
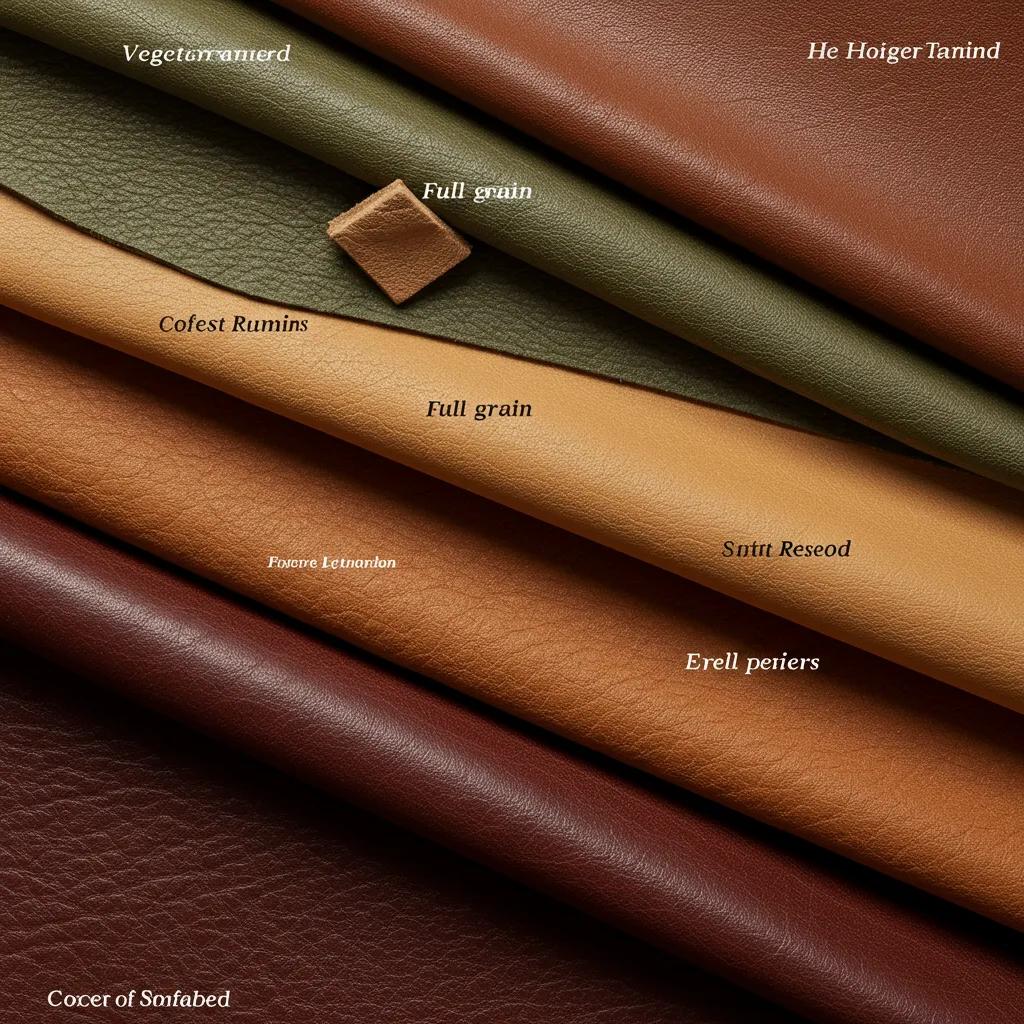
Material choice determines how well an embossed design holds up. Match leather to product function, expected wear and desired impression depth. Vegetable-tanned and full-grain leathers usually have higher fiber density and tannage stability, so they take deep impressions and resist relaxation — ideal for wallets, bags and stationery that must stay legible. Softer leathers like sheep and goat offer a luxurious feel but may soften impressions with use, so they suit garments or products where a subtle, worn look is acceptable. The comparison table below rates common leather types for durability, pliability and embossing suitability to help designers and buyers choose the right hide for each application.
| Leather Type | Durability / Pliability | Embossing Suitability |
|---|---|---|
| Vegetable-tanned (cow/buffalo) | High durability; firmer hand | High suitability; holds deep, long-lasting impressions |
| Full-grain (cow/buffalo) | Very high fiber integrity; robust | Very high suitability; excellent for crisp, durable embossing |
| Corrected-grain (finished) | Medium durability; uniform surface | Medium suitability; suited to shallow or foil embossing |
| Sheep/Goat (soft leathers) | Very supple; lower fiber density | Low–medium suitability; fine detail may soften with wear |
| Buffalo | High tensile strength; coarse grain | High suitability for bold, deep embossing |
Use this table to match leather type to product needs — choose vegetable-tanned or full-grain for long-term embossed clarity, and corrected-grain or softer leathers where surface uniformity or suppleness is more important. For customers evaluating materials, this guidance also supports our quoting, wholesale and export services by showing how hide selection impacts finished quality and longevity.
How Do Vegetable-Tanned and Full-Grain Leathers Enhance Embossing Durability?
Vegetable-tanned and full-grain leathers hold impressions because of dense fiber structure and stable tannage chemistry that lock the compressed shape in place. Vegetable tanning crosslinks collagen in a way that resists long-term deformation; full-grain preserves the original fiber matrix that supports detailed impressions. Examples: wallets and cardholders benefit from deep, legible embossing; straps and tags benefit from abrasion resistance. To keep embossed clarity, recommend light conditioning and avoid prolonged exposure to moisture or extreme heat, which can soften fibers and reduce impression depth.
What Leather Characteristics Prevent Cracking and Fading After Embossing?
Features that reduce cracking and fading include intact grain structure, flexible finish layers and finishing compounds that maintain surface cohesion under stress. High tensile strength and elastic topcoats let embossed areas stretch with use rather than fracture. Proper dyeing and finishing that retain fiber flexibility also contribute to long-term appearance. After embossing, light protective conditioning and user-care guidance — brief instructions on cleaning and conditioning — help preserve both color and impression depth over the product’s life.
How Do You Troubleshoot Advanced Leather Embossing Defects Like Burn Marks and Foil Flaking?
Advanced defects such as burn marks and foil flaking require quick triage to decide rework or rejection. Use a problem-cause-solution approach to guide immediate fixes, containment and long-term controls. For burn marks, review thermal settings, dwell time and leather sensitivity. For foil flaking, check adhesion parameters, foil chemistry and surface cleanliness. The table below maps common defects to likely causes, immediate fixes and preventive steps so teams can triage fast and implement improvements.
| Defect | Likely Cause | Immediate Fix + Preventative Action |
|---|---|---|
| Burn marks | Excessive temperature or long dwell; thin or heat-sensitive leather | Reduce temperature and test on sacrificial stock; shorten dwell; consider a thermal spreader for sensitive hides |
| Foil flaking | Poor adhesion from contamination or wrong foil/temperature pairing | Thoroughly clean surface and run an adhesion test; correct foil choice and temp/pressure settings, or switch to higher-bond foil |
| Sticking dies | Die residue, lack of release or excessive heat | Clean and polish die, apply compatible release agent, slightly lower temp and add die-release to maintenance routine |
This troubleshooting matrix gives technicians a practical triage sequence they can complete during a shift, then fold into preventive maintenance to stop recurrence. Fast remediation reduces downtime and supports quality improvement efforts.
What Causes Burn Marks and How Can They Be Avoided During Embossing?
Burn marks come from too much localized heat, long dwell or concentrated heat on thin, heat-sensitive hides; they show as dark, sometimes brittle patches confined to the embossing area. Avoid burns with conservative temperature settings, pilot-testing dwell times, using thermal spreaders or broader pressure transfer where practical, and avoiding hot-stamping on the thinnest hide areas. Record safe temperature ranges for each leather type in job setup sheets. If burning occurs, cool the part, lower the temperature, and decide whether buffing or scrapping is required. Maintain a heat-profile log and operator training to prevent repeats.
How to Fix Foil Flaking and Sticking Dies in Leather Embossing?
Foil flaking happens when adhesion fails because of surface contamination, incompatible foil chemistry, or incorrect temperature/pressure balance; the result is partial loss of metallic or pigmented layers. Immediate steps: clean the area, recondition if possible, and rerun a controlled adhesion test with adjusted settings; often switching to a higher-bond foil or slightly increasing dwell at a safe temperature solves the problem. Sticking dies are resolved by cleaning die faces, applying a compatible release agent, polishing to remove micro-roughness and confirming die flatness. Preventive maintenance — regular die cleaning and a die-release schedule — reduces recurrence of both issues. Document fixes so production teams can prevent future interruptions.
| Defect | Likely Cause | Value (Immediate Fix + Preventative Action) |
|---|---|---|
| Foil flaking | Contaminated surface, low-adhesion foil | Clean surface, run adhesion test, upgrade to higher-adhesion foil and control temp/pressure |
| Sticking dies | Residue buildup or die surface damage | Clean and polish die, apply release agent, keep a die-maintenance schedule to avoid repeats |
| Burn marks | Excess heat or long dwell | Lower temperature, reduce dwell, test on sacrificial stock and record safe ranges |
This consolidated table pairs quick remediation with longer-term process changes to reduce advanced defects and support continuous improvement in embossing operations.
How Does Pakistan Leather Ensure High-Quality Embossing and Prevent Common Problems?
Pakistan Leather (also trading as Atlanta Enterprises) combines manufacturing controls, skilled artisans and careful material selection to minimize embossing defects and deliver consistent finished goods. Our workshops focus on custom, hand-finished leather items and on developing processes to meet client specifications across sheep, goat, cow and buffalo hides selected for their embossing performance. QA checkpoints include pre-run calibration, die and press inspection, standardized conditioning routines and final visual verification of depth, clarity and foil adhesion. Small case examples show how calibration and pilot stamping prevent uneven imprints, and how pairing vegetable-tanned or full-grain hides with the right foil and temperature setting reduces foil flaking and preserves detail. These controls support our wholesale and export services by demonstrating reliable process capability and product quality.
What Manufacturing Standards and Artisan Skills Prevent Embossing Defects?
At Pakistan Leather we document calibration routines, train operators on pressure and temperature mapping, and combine machine precision with artisan finishing — hand burnishing, careful conditioning and expert die handling — to meet aesthetic and functional standards. Artisans trained in die care and hand-stitching avoid over-handling embossed areas, reducing surface damage after stamping. QA steps such as verification stamps, die inspections and batch traceability catch issues before shipment. This blend of trained hands and standardized procedures lowers returns and rework while delivering consistent embossing across product lines.
Leather Embossing: A Key Production and Finishing Method
Other production and finishing methods include printing, embossing, inspection and final assembly. Lengthwise and crosswise cuts and unit preparation for packaging are part of final assembly operations.
Production Methods, 2012
How Does Pakistan Leather’s Material Selection Support Flawless Embossing?
Pakistan Leather selects hides to suit each product—using vegetable-tanned or full-grain leathers for deep, durable embossing and choosing softer sheep or goat leathers when a gentler, worn aesthetic is preferred. Our product range — jackets, biker wear, vests, skirts, bags, wallets, card holders, aprons, belts and promotional items like cases, tags, coasters and keychains — allows us to match hide type and processing to the intended embossing depth and wear profile. Material choice is accompanied by finishing controls (color matching and consistent topcoats) so impressions remain legible and resist abrasion. For custom runs, wholesale or export orders, we adapt hide selection and processing parameters to preserve embossed clarity across use cases and volumes.
Embossing Parameters and Leather Properties
Embossing influences vegetable-tanned leathers differently depending on parameter settings. Average surface distension and strength values vary with embossing conditions.
Influence of embossing parameters on colour changes and shape retention behaviour of vegetable‑tanned leathers, S Omur, 2025
Frequently Asked Questions
What is the importance of moisture content in leather embossing?
Moisture determines fiber pliability. Properly conditioned leather accepts and holds an impression as it cools; too little moisture makes the hide brittle and prone to cracking, while too much relaxes fibers and blurs detail. Use moisture checks and repeatable conditioning steps for consistent results across leather types — this improves final embossing quality.
How can I choose the right leather type for embossing?
Match leather to intended use. Vegetable‑tanned and full‑grain leathers are best for deep, long-lasting impressions because of higher fiber density and stability. Softer leathers like sheep or goat feel luxurious but may soften impressions over time; they work well for garments or pieces where a softer, aged look is acceptable. Consider expected wear and desired depth when selecting hides.
What maintenance practices should be followed for embossing dies?
Regular die care keeps impressions crisp: clean dies after each use, polish to maintain sharp edges and inspect for nicks or wear. Maintain a schedule for checks and log wear trends so you can regrind or replace dies before they degrade print quality. Proper die upkeep lengthens tooling life and reduces production costs.
How does temperature control affect the embossing process?
Temperature control affects how leather responds to the die. The right heat softens the surface for a clean impression without scorching. Overheating causes burn marks and fiber breakdown; inadequate heat produces shallow impressions. Monitor temps closely and test on sacrificial pieces to find safe settings before full production runs.
What are the common causes of foil flaking in leather embossing?
Foil flaking is usually an adhesion issue caused by surface contamination, incorrect foil choice or wrong temperature/pressure settings. Prevent it by thoroughly cleaning die and leather surfaces, selecting the correct foil chemistry for the hide and validating settings through adhesion tests. If flaking occurs, clean and retest with adjusted parameters or a higher-bond foil.
How can I troubleshoot advanced embossing defects effectively?
Use a structured problem-cause-solution approach. Identify likely causes (excess heat, poor adhesion, die wear), apply immediate fixes (adjust temperature, clean surfaces, recondition) and document outcomes. A troubleshooting matrix speeds diagnosis and reduces downtime while building a record for continuous improvement.
What role does artisan skill play in leather embossing quality?
Artisan skill is essential. Skilled operators handle dies, prep surfaces and finish pieces with care — minimizing over-handling and distortion of embossed areas. Their judgment during setup and inspection complements machine precision and ensures each piece meets both aesthetic and functional standards.
Conclusion
Clear, repeatable embossing starts with the right material, disciplined setup and ongoing tool care. Use the checks and procedures in this guide to reduce defects, improve first-pass yield and extend tooling life. If you’re ready to improve your embossing results, explore our leather grades and tooling options — we can advise on hide selection, process parameters and production-ready samples to help you achieve consistent, high-quality embossing.


