
Ensuring Clean Leather Cuts
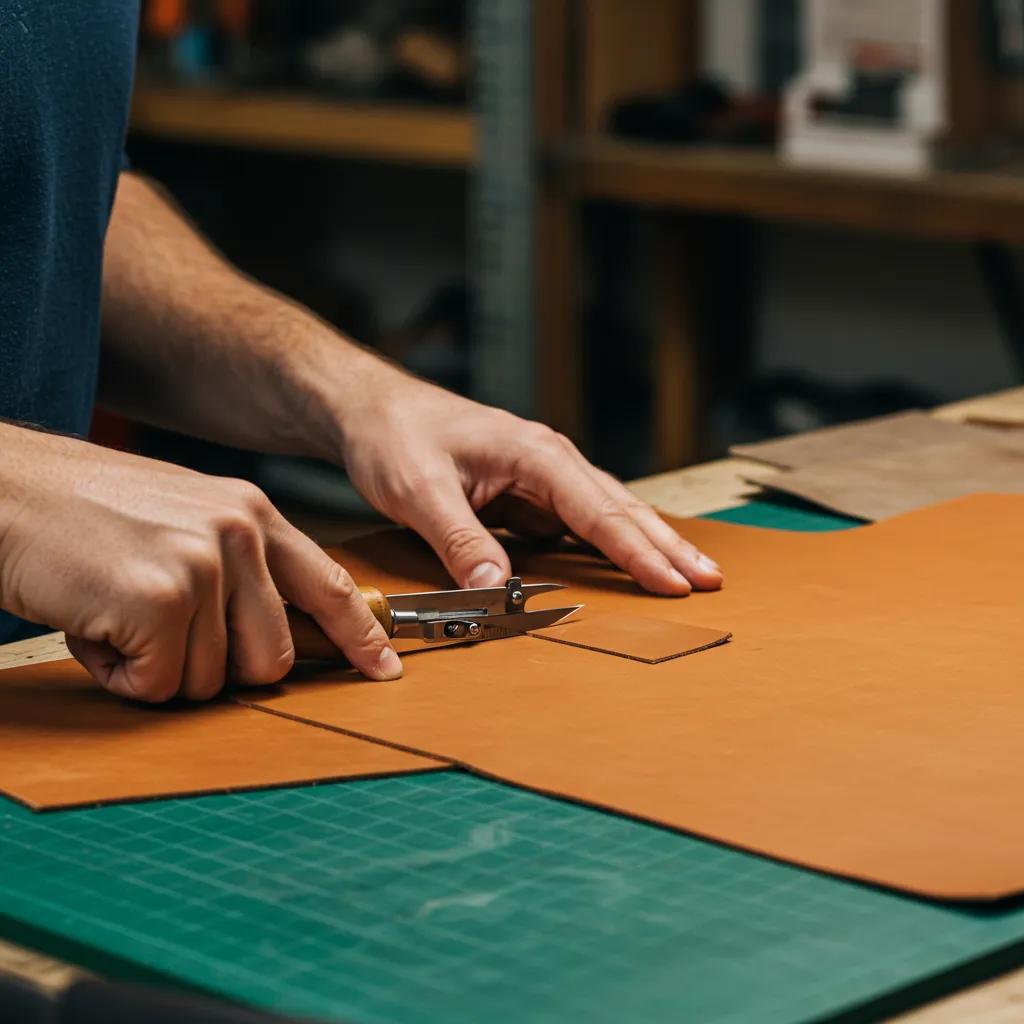
Precision Leather Cutting: A Practical Guide to Clean, Consistent Cuts
Clean leather cuts mean the leather fibers separate predictably to produce smooth, stable edges with little fray, accurate dimensions, and seams that behave as expected. Precision cutting matters because it affects fit, assembly, durability, and the final look of jackets, bags, belts and other leather goods. This guide lays out practical techniques, tool choices, preparation steps, and QC checks so hobbyists can judge workmanship, buyers can spot quality, and makers can improve consistency. You’ll find clear advice on hand tools and advanced cutters, step-by-step workflows for straight and curved cuts, core edge finishes like skiving and burnishing, and how preparation and inspection protect cut quality. Industry keywords such as leather cutting precision, flattening leather, marking leather, skiving for clean edges, and die cutting leather are used here in actionable, studio-to-factory guidance.
What Are the Best Tools for Achieving Clean Leather Cuts?
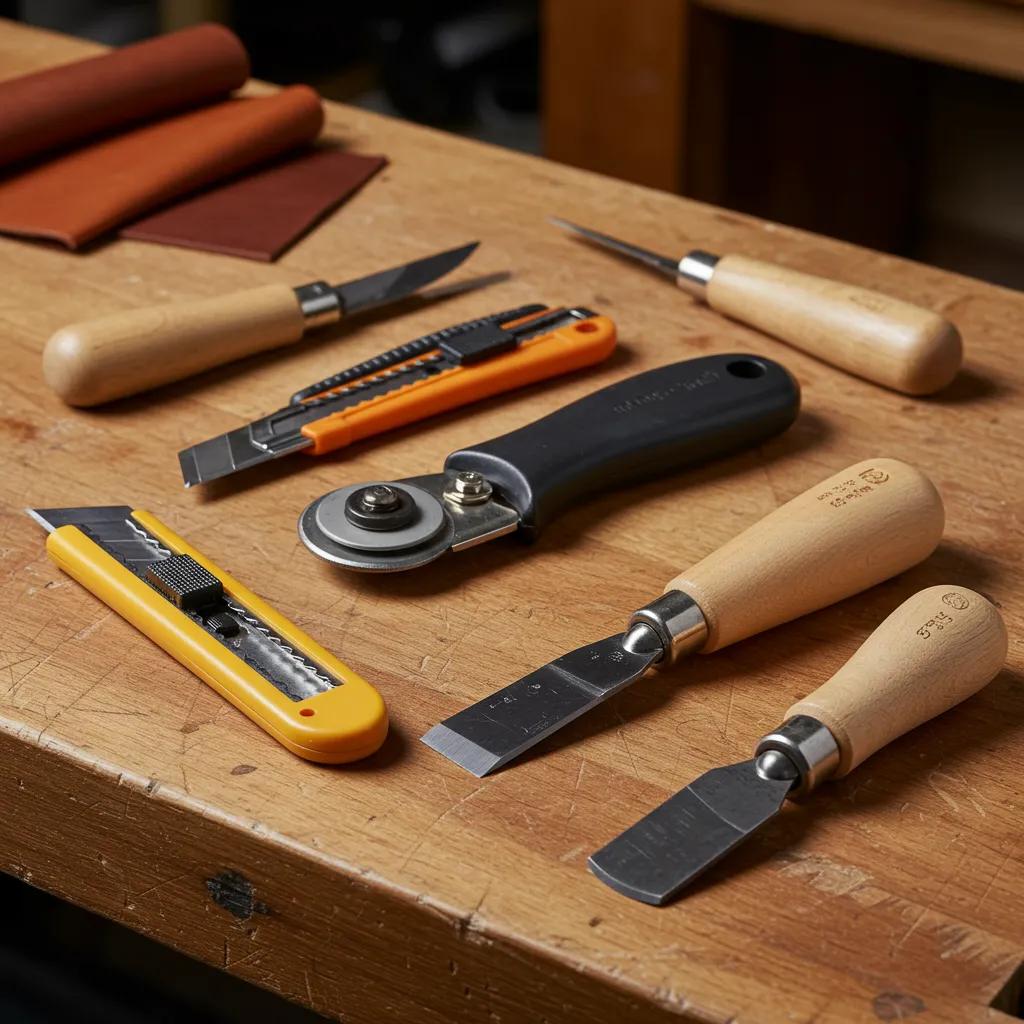
Every clean cut starts with the right tool and a razor-sharp blade. Tool choice determines achievable tolerances, edge quality and speed. For small runs and detailed work, hand tools like utility knives and leather shears give control; rotary cutters and skiving knives are better for long straight cuts and edge thinning. At production scale, die cutting and laser cutting deliver repeatable tolerances and reduce operator variability—essential when many panels must match. Ongoing tool care—sharpening, timely blade changes and clean cutting surfaces—directly affects fiber compression and fray, so a good tool is as much about maintenance as initial purchase. Below we outline top hand tools and advanced technologies, plus a compact comparison to pair tool to leather thickness and project type.
Top tools for clean leather cuts, chosen for accuracy, versatility and maintenance ease, include:
- Utility knife with replaceable blades: Excellent for controlled straight cuts and scoring medium leathers.
- Rotary cutter (high‑quality blade): Fast, uniform long cuts and pattern work on thin-to-medium hides.
- Leather shears: Best for trimming and curves—scissor control reduces scalloping.
- Skiving knife / beveler: For thinning edges and removing bulk at seams so layers sit flat.
- Die cutter / laser cutter: Production tools for repeatability and complex shapes that hand cutting can’t match.
Choose a mix that fits leather thickness and production scale. Matching tool to task reduces rework and keeps edges consistently clean.
H3: Which Hand Tools Deliver the Sharpest Leather Cuts?
Hand tools give tactile feedback and a low setup cost—important for small shops. Blade profile and edge geometry make a measurable difference: utility knives with fresh carbon or stainless blades give straight-line accuracy, and frequent blade changes plus stropping keep the edge slicing fibers rather than crushing them. Long, polished leather shears cut smoother curves with less scalloping; skiving knives with precise bevels let you control seam allowance and thickness. Routine care—scheduled sharpening, using a leather strop, and dry storage—prevents burrs that tear fibers and cause fuzz. These fundamentals also clarify when advanced cutters are a better fit for volume or complexity.
H3: How Do Advanced Technologies Like Die Cutting and Laser Cutting Improve Precision?
Advanced cutters solve repeatability and tight-tolerance needs that are hard to sustain by hand. Die cutting makes identical panels quickly once a die exists, controlling dimensional tolerance across hundreds or thousands of pieces—ideal for simple shapes and high throughput. Laser cutting produces very fine contours with minimal mechanical distortion, suited to overlays, perforations and intricate detailing with near‑zero contact. Trade-offs include die cost and setup time for die cutting, and possible heat-affected zones or surface marking with lasers, depending on finish; both require calibration and proper exhaust to keep quality consistent. Knowing these trade-offs helps you decide whether to invest in dies, laser workflows, or stick with hand cutting for bespoke work.
Intro to tool comparison table: the table below helps match common cutting tools to leather thickness, best uses, accuracy and maintenance needs.
| Tool | Best for | Leather thickness | Accuracy | Maintenance |
|---|---|---|---|---|
| Utility knife | Straight cuts, scoring | Thin–medium | High (with guide) | Frequent blade replacement, stropping |
| Rotary cutter | Long, fast cuts | Thin–medium | High | Blade sharpening/replacement, clean mat |
| Leather shears | Curves, trimming | Thin–medium | Medium-high | Regular sharpening, oil hinge |
| Skiving knife | Edge thinning, seams | Thin–thick (controlled) | High | Honing, strop, blade alignment |
| Die cutter | Mass panel cutting | Thin–thick | Very high | Die inspection, hydraulic checks |
| Laser cutter | Intricate patterns | Thin–medium | Very high | Optics cleaning, focal calibration |
How Do You Cut Leather Straight and Avoid Frayed Edges?
Straight, clean cuts depend on a controlled workflow: flatten the hide, mark your layout, secure the leather and use precise guides to steer the blade. Flattening removes memory and tension so measurements don’t warp; a scribe or chalk gives a visible guide, and a steel ruler or straightedge prevents blade drift. Technique matters—consistent single-direction slicing strokes, a steady blade angle, and multiple light passes for thicker hides reduce tearing and scalloping. Finish the edge after cutting—skive, seal or burnish—to stop fray and ready the edge for stitching. Below we break the straight-cut workflow into clear, actionable steps and anti-fray measures before and after cutting.
Before the step-by-step guide, this list summarizes a repeatable workflow that reduces drift and fiber damage:
- Flatten the leather and tension it evenly so your measurements hold across the panel.
- Mark and score the cut line with a scribe or light score to guide the blade.
- Clamp and secure the leather and guide using a steel ruler to prevent slipping during the stroke.
- Use controlled slicing strokes with a sharp blade, hold a shallow angle and clear the cut in steady passes for thicker hides.
- Stabilize the cut edge with skiving, sealing or burnishing before stitching or assembly.
Following these steps creates a repeatable process for accurate straight cuts and reduces variables that cause fray or dimensional errors.
Troubleshooting tips: if the blade slips, check clamp pressure and ruler alignment; if scalloping appears on curves, switch to shears or use shorter slicing strokes; if edges fuzz, sharpen or replace the blade and consider sealing or skiving before assembly. Consistent technique and tool care lead naturally into edge finishing, the next section.
H3: What Techniques Ensure Perfect Straight Leather Cuts Every Time?
Perfect straight cuts come from mechanical guides, controlled tension and disciplined blade management. Use a weighted cutting surface and clamp a steel ruler as a fence so the blade follows one line; a non-slip cutting mat prevents the hide from moving. For thicker leather, make multiple shallow passes rather than forcing a deep cut, and keep the blade angle consistent on every pass to avoid bevel variance. Maintain a steady hand position and move with your forearm rather than twisting the wrist; this steadies the stroke and keeps the cut true. Practice builds the muscle memory that produces cleaner edges and makes later finishing simpler.
H3: How Can You Prevent Fraying and Maintain Clean Leather Edges?
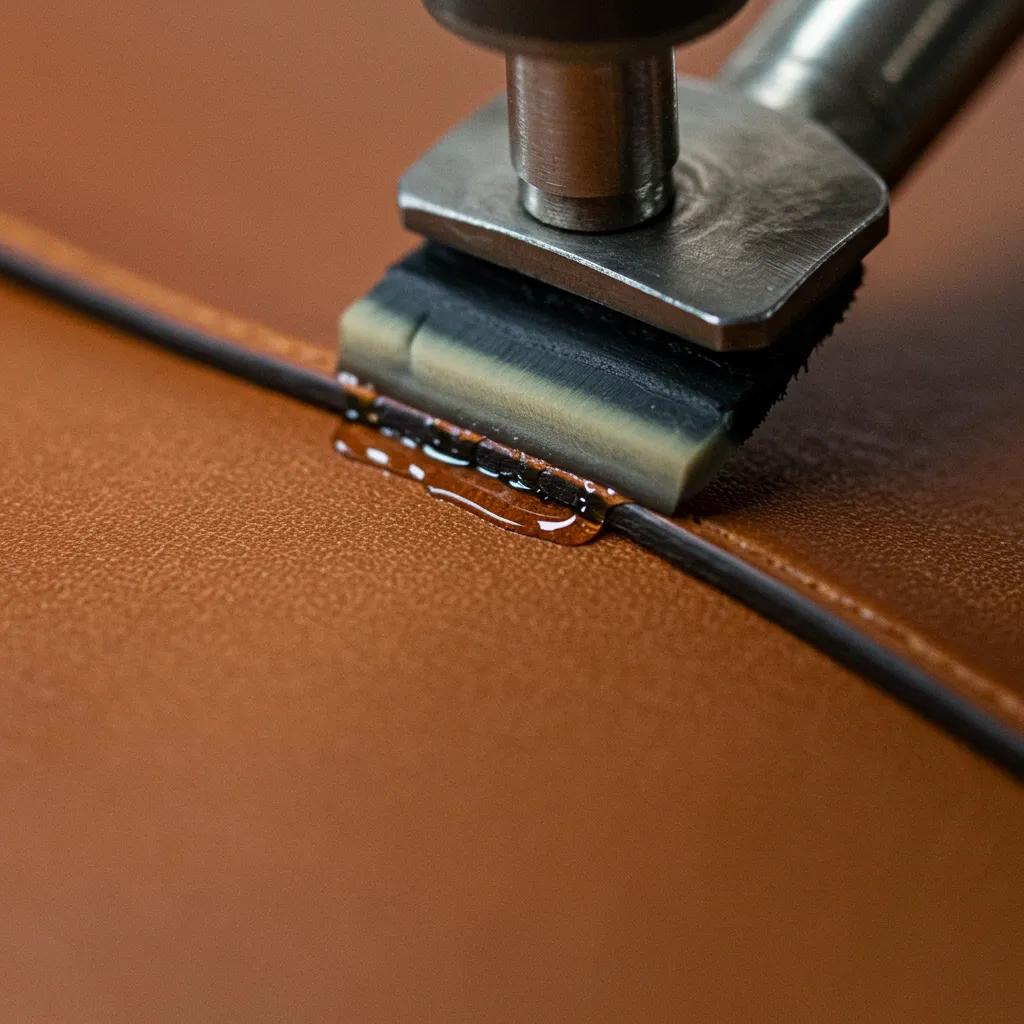
Preventing fray combines reducing loose fibers at the cut and applying a finish that seals or compresses the edge. Skiving reduces exposed fiber depth where seams meet, lowering the chance of fiber lift. On loose-grain leathers, lightweight adhesive backings or stabilizers can stop fibers from rising during cutting. Edge paints and sealers close the surface to limit fiber movement; burnishing compresses and polishes fibers into a smooth, abrasion-resistant edge. For heavy-use items, a sequence of skiving, burnishing and an edge coat gives the best durability. The following list summarizes core finishing approaches and when to use them.
- Skiving: Thin the edge for flat seams and tidy stitch lines.
- Beveling: Soften corners for a refined look and less wear on edges.
- Burnishing: Compress and polish fibers with friction and compounds to seal the edge.
What Are the Key Leather Edge Finishing Techniques for Clean Cuts?
Edge finishing turns a raw cut into a durable, attractive boundary that resists wear and fraying. The main techniques—skiving, beveling and burnishing—each serve different structural and aesthetic goals. Skiving removes bulk where layers overlap so seams lie flat and stitching doesn’t pucker—important for garments and slim-profile bags. Beveling rounds sharp corners to reduce stress and abrasion, and burnishing uses friction, moderate heat and finishing compounds to close exposed fibers, creating a smooth, glossy edge that stands up to handling. Below we outline the mechanics of skiving and beveling and practical burnishing steps so you can choose the right sequence for your product.
Before the skiving table, remember: correct tool angle and staged passes prevent over-thinning and preserve edge strength for burnishing.
H3: How Does Skiving and Beveling Enhance Leather Edge Quality?
Skiving and beveling remove bulk and lower stress at joins. Skiving tapers thickness so multiple layers meet without a ridge; beveling removes the sharp corner for a rounded, resilient edge. Mechanically, skiving reduces cross-section at seam allowances so the thread sits flush and needles don’t strain thick material, improving stitch appearance and seam life. Recommended skive depth depends on thickness—thin leathers need a light taper, thicker hides require staged skives to avoid cutting through. A consistent, small bevel radius reduces wear on belts and pocket mouths. Together these steps prepare the edge for effective burnishing and finishing.
Intro to burnishing practice: burnishing converts a prepared edge into a sealed surface using friction and finishing compounds—follow the steps below and test on scrap.
H3: What Are the Best Practices for Burnishing Leather Edges?
Burnishing follows a clear sequence: prep (trim and sand any fuzzy fibers), apply a thin adhesive or gum, burnish with a slicker under controlled friction, then finish with a compound for sheen and protection. Use wooden or acrylic slickers, canvas straps, and compounds such as gum tragacanth or beeswax blends—each yields different sheen and feel, so test on scraps to dial pressure and timing. Apply moderate friction to avoid heat damage—excessive heat can darken or blister the surface—rotate the slicking motion and add compound in thin layers. Vegetable-tanned leather tolerates more aggressive friction for high shine; chrome-tanned leathers often burnish faster but with a different gloss. Proper burnishing produces a durable, attractive edge that complements accurate cutting.
| Finishing Technique | Purpose | Key Steps |
|---|---|---|
| Skiving | Reduce bulk at seams | Controlled thinning in passes; test depth on scrap |
| Beveling | Round edge and reduce wear | Use beveler for consistent radius; sand lightly |
| Burnishing | Seal and polish edge | Prep, glue, friction burnish, apply finishing compound |
How Does Leather Preparation Impact the Quality of Leather Cuts?
Preparation makes cutting predictable: choose the right leather, flatten hides, condition surfaces and mark layout lines to lower variability. Leather type changes how a blade behaves—sheep and goat skins are fine-grained and can tear more easily; cow and buffalo leathers are thicker and need heavier blades or staged passes; tanning (vegetable vs chrome) affects burnishing and adhesive behavior. Proper flattening and tensioning remove shape memory, and light conditioning or a rest after humidity changes stabilizes fibers so cuts stay true. Use the right marking tools (scribe, chalk, low-residue markers) and score thick hides so blades follow the intended path. Below we compare common leather types and recommend cutting and finishing approaches.
Intro to leather type comparison table: use this table to match leather to cutting and finishing methods.
| Leather Type | Grain & Thickness | Recommended cutting method | Susceptibility to fraying |
|---|---|---|---|
| Sheep | Fine grain, thin | Precision utility knife, light passes | Moderate—handle gently |
| Goat | Tight grain, thin–medium | Rotary cutter or shears for curves | Moderate—score for thick areas |
| Cow (steer) | Medium grain, medium–thick | Utility knife or die cutting for panels | Low–moderate, depends on finish |
| Buffalo | Coarse grain, thick | Skiving + staged cuts or die cutting | Low, but stage cuts for thickness |
H3: Why Is Selecting the Right Leather Type Important for Clean Cuts?
Leather properties—grain tightness, fiber direction, thickness and tanning method—guide blade geometry, cutting speed and finishing choices. Mismatching tool to material causes torn fibers, scalloped edges and poor seams. Fine-grain leathers like sheep and goat need sharper, thinner blades and gentler handling; thick cow and buffalo hides benefit from staged cuts, skiving or mechanical assistance to reach flat, stitchable edges. Always orient patterns with fiber direction where possible. Choosing the right leather up front saves corrective work and preserves edge quality.
H3: How Should Leather Be Conditioned and Marked Before Cutting?
Conditioning and marking set a stable baseline: flatten hides on a dry, flat surface, let them rest after humidity shifts, and condition lightly only when the leather needs flexibility—over-oiling can cause slippage or staining. For precise layouts use a scribe for permanent score lines on thick hides and low-residue chalk or wash-off markers on finished surfaces to avoid dye transfer; practice on scrap to confirm visibility and removal. For slippery finishes, a light non-permanent adhesive backing or double-sided temporary tape on the underside will stabilize thin hides during cutting. These simple prep steps reduce surprises and let edge finishing succeed.
Brief company case note: Pakistan Leather emphasizes careful hide selection and conditioning in production—manual flattening and pre-cut scoring are standard steps to reduce variability and protect cut integrity during bulk panel production.
What Quality Control Standards Ensure Consistently Clean Leather Cuts?
Consistent, clean cuts at scale need measurable QC checkpoints, clear acceptance criteria and disciplined tool maintenance to preserve dimensional accuracy and edge quality across batches. QC should include dimensional tolerance checks against patterns, edge inspections for fiber tear and burnish uniformity, and scheduled maintenance of blades, dies and lasers to prevent drift. Sampling plans—first-piece verification, periodic samples and final audits—create traceability and fast corrective feedback. Recording tool life and calibration logs supports consistent die/laser performance and helps root-cause issues when edge quality slips. The sections below explain Pakistan Leather’s production controls and how maintenance keeps precision on target.
Intro to QC checklist list: implement these practical checkpoints to make QC actionable on the shop floor.
- Dimensional tolerance check: Measure critical dimensions against the pattern for the first piece and periodic samples.
- Edge finish inspection: Visual and tactile checks for fraying, uniform burnish and seam flatness.
- Tool maintenance log: Record blade changes, die inspections and laser calibrations with dates and operators.
H3: How Does Pakistan Leather Maintain Precision in Large-Scale Production?
Pakistan Leather (trading as Atlanta Enterprises) keeps precision through standardized cutting workflows that combine die-cutting for high-volume panels and laser cutting for intricate or bespoke parts. Their process prioritizes pattern verification, pre-cut conditioning and staged inspections—first-piece checks, mid-run sampling and end-of-run audits—to catch dimensional drift early and protect export-grade quality. Skilled artisans then handle hand-finishing work like skiving and burnishing so edges meet high workmanship standards for jackets, bags and belts. This balance of automated cutting for repeatability and hand finishing for detail sustains consistent, clean cuts at scale.
Advances in laser cutting make it an attractive option alongside traditional methods—improving precision and efficiency in leather machining.
Advanced Laser Cutting for Precision and Efficiency in Leather Machining
Traditional leather cutting techniques—manual cutting, rotary cutting and die pressing—have long served the industry but can be labour‑intensive and limited in precision. Modern methods like water jet, ultrasonic and especially laser cutting deliver finer control and higher throughput. This review surveys semiconductor laser diode advances for sustainable leather machining: improved pulse control reduces energy use and helps limit carbonization during cutting.
Review of semiconductor laser diode technologies for sustainable energy in leather machining, V Swaminathan, 2025
H3: What Role Does Tool Maintenance Play in Achieving Flawless Leather Cuts?
Tool maintenance drives cut consistency: dull blades compress instead of slice, misaligned dies make uneven edges, and uncalibrated lasers shift kerf and detail—creating assembly issues. A practical maintenance checklist includes daily blade inspections, weekly stropping or sharpening, routine die alignment after set hours and scheduled laser optics cleaning and focal checks. Define acceptance criteria—maximum dimensional deviation, acceptable edge finish rating on tactile inspection—and train operators to log issues and act on deviations. Small, regular maintenance investments reduce scrap, cut rework and keep edges consistently clean across production runs.
Intro to QC EAV table: the table below lists QC checks, frequency and acceptance criteria used to monitor cut consistency.
| QC Check | Frequency | Method / Acceptance Criteria |
|---|---|---|
| Dimensional tolerance | First-piece & hourly samples | ± specified mm tolerance per pattern; adjust die/laser if exceeded |
| Edge inspection | Every shift sample | No visible fraying; burnish uniformity; seam flatness within tolerance |
| Blade/die maintenance | Daily/weekly | Replace blade or resharpen at set wear marker; die integrity check |
| Laser calibration | Weekly/monthly | Focal and power checks; no char beyond allowable margin |
How Can You Master Curved and Intricate Leather Cuts?
Curves and complex shapes need control over blade radius, good support for the leather and a steady cutting rhythm to avoid scallops or jagged edges. Hand cutting favors short, controlled slicing strokes with small shears or a narrow-blade utility knife; support the leather behind the cut to prevent pull and distortion. Templates, punches and internal patterns boost repeatability when identical parts are required, while die or laser cutting scale intricate shapes for production without losing fidelity. Curved edges often need extra beveling and careful burnishing so the finish follows the contour. Below we present hand techniques for smooth curves and how templates and punches help consistency.
Before templates and punches, practice drills and the right tool choices build the hand skills needed for fine curves.
H3: What Techniques Help Achieve Smooth Curved Leather Cuts?
Smooth curves combine the right blade, proper support and disciplined strokes. Use a narrow-radius blade or small shears, secure the leather and make multiple short slicing strokes that follow the curve rather than forcing a single long cut. Rotating the workpiece instead of the blade often delivers better control; a mandrel or padded form supports tight curves so the leather won’t buckle. Practice cutting concentric arcs on scrap and vary stroke length to build muscle memory and find the best blade radius for each curve. These habits reduce scalloping and prepare edges for beveling and burnishing.
H3: How Do Templates and Punches Assist in Consistent Complex Shapes?
Templates and punches turn an artisan’s shape decisions into repeatable patterns for bespoke or mass production. Durable template materials—aluminum, acrylic or hardened plastic—resist wear and provide reliable fences for blades, while punches and shaped dies eliminate long blade strokes where repeat cutouts are needed. Combining physical templates with die or laser cutting preserves the original profile while boosting throughput and lowering operator variance. Secure templates and check alignment regularly so each part meets dimensional tolerances required for trouble-free assembly.
Practical note on production repeatability: Pakistan Leather uses templates, punches and digital cutting to produce repeatable complex shapes for bespoke and wholesale orders, pairing machine cutting with hand finishing to balance detail and volume.
Frequently Asked Questions
What Are the Common Mistakes to Avoid When Cutting Leather?
The most common mistakes are using dull blades, poor tensioning and skipping accurate marking. Dull blades crush fibers instead of slicing, causing frayed edges. Failing to flatten the hide leads to warped cuts. Rushing, uneven pressure or the wrong blade for the job creates scalloping. Take time to prepare, use sharp tools and follow a steady cutting technique to improve results.
How Can I Choose the Right Leather Thickness for My Project?
Choose thickness by intended use. Thin leathers (1–2 mm) work well for wallets and soft bags; medium (2–3 mm) suits belts and straps; thick leathers (3 mm and above) fit heavy-duty items like saddles. Balance durability against flexibility, and plan cutting and finishing techniques around the chosen thickness for best results.
What Is the Importance of Edge Finishing in Leather Crafting?
Edge finishing matters for both function and appearance. Properly finished edges prevent fraying, extend durability and give a polished look that raises perceived quality. Skiving, beveling and burnishing reduce bulk, soften sharp edges and seal fibers into a smooth surface. Investing time in edge finishing pays off in longevity and a refined final product.
How Do I Maintain My Leather Cutting Tools?
Regular maintenance is essential. Inspect blades and replace or sharpen when dull. Use a strop to keep hand blades keen and prevent burrs. Keep cutting mats and surfaces clean. For dies and lasers, follow scheduled calibration and inspections. Good care extends tool life and maintains cutting precision.
What Are the Benefits of Using Templates for Leather Cutting?
Templates improve consistency and accuracy—vital for repeatable parts. They reduce human error, speed up cutting and ensure identical pieces for production runs. Templates are especially helpful for intricate designs where uniformity affects assembly quality.
How Can I Improve My Skills in Leather Cutting?
Practice and study are the fastest paths to improvement. Master straight cuts and edge finishing first, then move to complex shapes. Use tutorials, workshops and mentoring from experienced craftsmen. Practice on scrap to build muscle memory, and seek feedback to refine technique. Regular, focused practice will noticeably raise your skill level.
Conclusion
Precision leather cutting is the foundation of fine craftsmanship—clean edges and well-behaved seams start with the right tools, preparation and technique. Apply the workflows and finishing methods here, keep tools maintained, and set simple QC checks to protect consistency. With practice and the right process, you’ll produce cleaner cuts, better assembly and longer‑lasting leather goods. Start applying these steps in your next project and raise the standard of your work.


